
On the first day of finding out that schools we canceled, church services were on hold, and that my husband woould now be working from home, we ran out and bought are new baby chicks for the boys to take care of during this time of “quarantine”. Our older chickens had stopped laying the previous summer so last fall we had given them to someone who wanted them. We knew we would be buying new baby chicks sometime this year and realized this was the perfect time.

Some of you may remember that during our isolated time as a family this spring, during COVID, we built a treehouse with the boys. While building the treehouse we knew we would need to build a new chicken coop shortly after finishing the treehouse. Our old chicken coop was great, but just to short to get into if necessary. For us, getting into the coop to clean it or check on a hen is a must. We knew we wanted something tall enough for us to be able to stand in it. No more getting in on hands and knees (yuck!).
One day, while working on the treehouse, I had a great idea pop into my head. Why don’t we just enclose the bottom of the treehouse and make that the chicken run??? It would be tall enough to stand in and it would be covered for the winter months.

Our coop has an 8′ x 8′ base. Its tallest point is 8″ tall. Now, I will not be giving you exact instructions and building plans on how to replicate this coop because to be honest, I just don’t know them. This was my husband’s project. I just told him what I wanted it to kind of look like and assisted him in building it. I did do all the painting and “Hen House” sign making. So I will have more detailed instructions below on those. Ok so here are all the measurements (in the pictures) and how we put together the coop, just in case you want to replicate it.

Front View Measurements

Side View Measurements

Back View Measurement
We began by building the 8′ x 8′ base/floor where we wanted it in the yard. Kevin then used our flat/level basketball court to build the 4.5′ walls. Once the walls were built we moved them to the base and attached them.


Now for the hard part, figuring out exactly what we wanted the front to look like and building it. We built the front and back of the chicken coop on the basketball court as well, since it was level and made it easier to keep everything square. Once they were both built we carried them to the base and attached them. Once those walls were finished we were so relieved. That was the part we were dreading the most. Phew!


Now build the two nesting boxes and attach them to the coop. (I don’t seem to have any pictures of this stage of the build. I’m not really sure why? I did attach a picture that is angled to show the open nesting box at the end of the build.)
Now we went around and attached all the 1 x 3 trim pieces (actual width was 2.5″) on all the corners and around all the “cut-outs”.
We built the door just as we did the walls. We framed the door with the 2 x 4 ‘s and covered it in the panelling. We then trimmed it with the 3-1/2″ reversible trim.
The window frames we made with the 1 x 3 trim. We used a table saw to cut the center pieces smaller in width. We did not attach the nonglare picture glazing until after the frame was painted and all dry.
Now we put the plywood on as the base of the roof. As my husband installed the plywood, I painted the entire coop with the exterior satin white paint.


FAUX WOOD DOOR & WINDOW FRAMES
Now for the painting of the door and the window frames. I wanted the door to look like wood. I wanted the frames to match the door. I wanted them both to match the treehouse that is set up right next to it. Most of the treehouse is done in pressure treated wood. So I needed to figure out exactly what color that was. Let me just say, NO WHERE does ANYONE mention what color that is. So I grabbed a scrap piece of our wood and took it to Home Depot. I looked at all the paint swatches! I matched the lightest part of the wood and the darkest part of the wood. Then I had them mix up those two colors for me.
Supplies:
- Behr Ultra Exterior Satin, Maple Glaze
- Behr Ultra Exterior Satin, Earth Fired Red
- Varathane Urethane, Oil Based, Satin
- Paint Glaze
- Graining Tool
- Old Towel
- Brushes
I began by paint two coats of the Maple Glaze paint color onto the door and windwo frames. Allow to dry completely.

I mixed my glaze just as I did on my Wood Glaze Finish post. I did however add a touch of black paint to the Earth Fired Red Paint Color, not a lot just a tiny amount.

Work in small-ish sections. Paint the glaze you have mixed up onto a portion of the door or window frame. Now slide and rock the wood graining tool down over the wet glaze, just as I did in my faux wood door video clip. Now let that sit for about 5 minutes. Now take your old towel and wipe over the excess glaze off.
Once the glaze is completely dry, paint two healthy coats of the urethane (drying in between each coat) over the door and window frames. This will help the color so as not to fade and protect the pain from the elements.


Now we attached the windows on some hinges. We prop open the wondows when it is a very hot day to allow a breeze to blow through the coop.


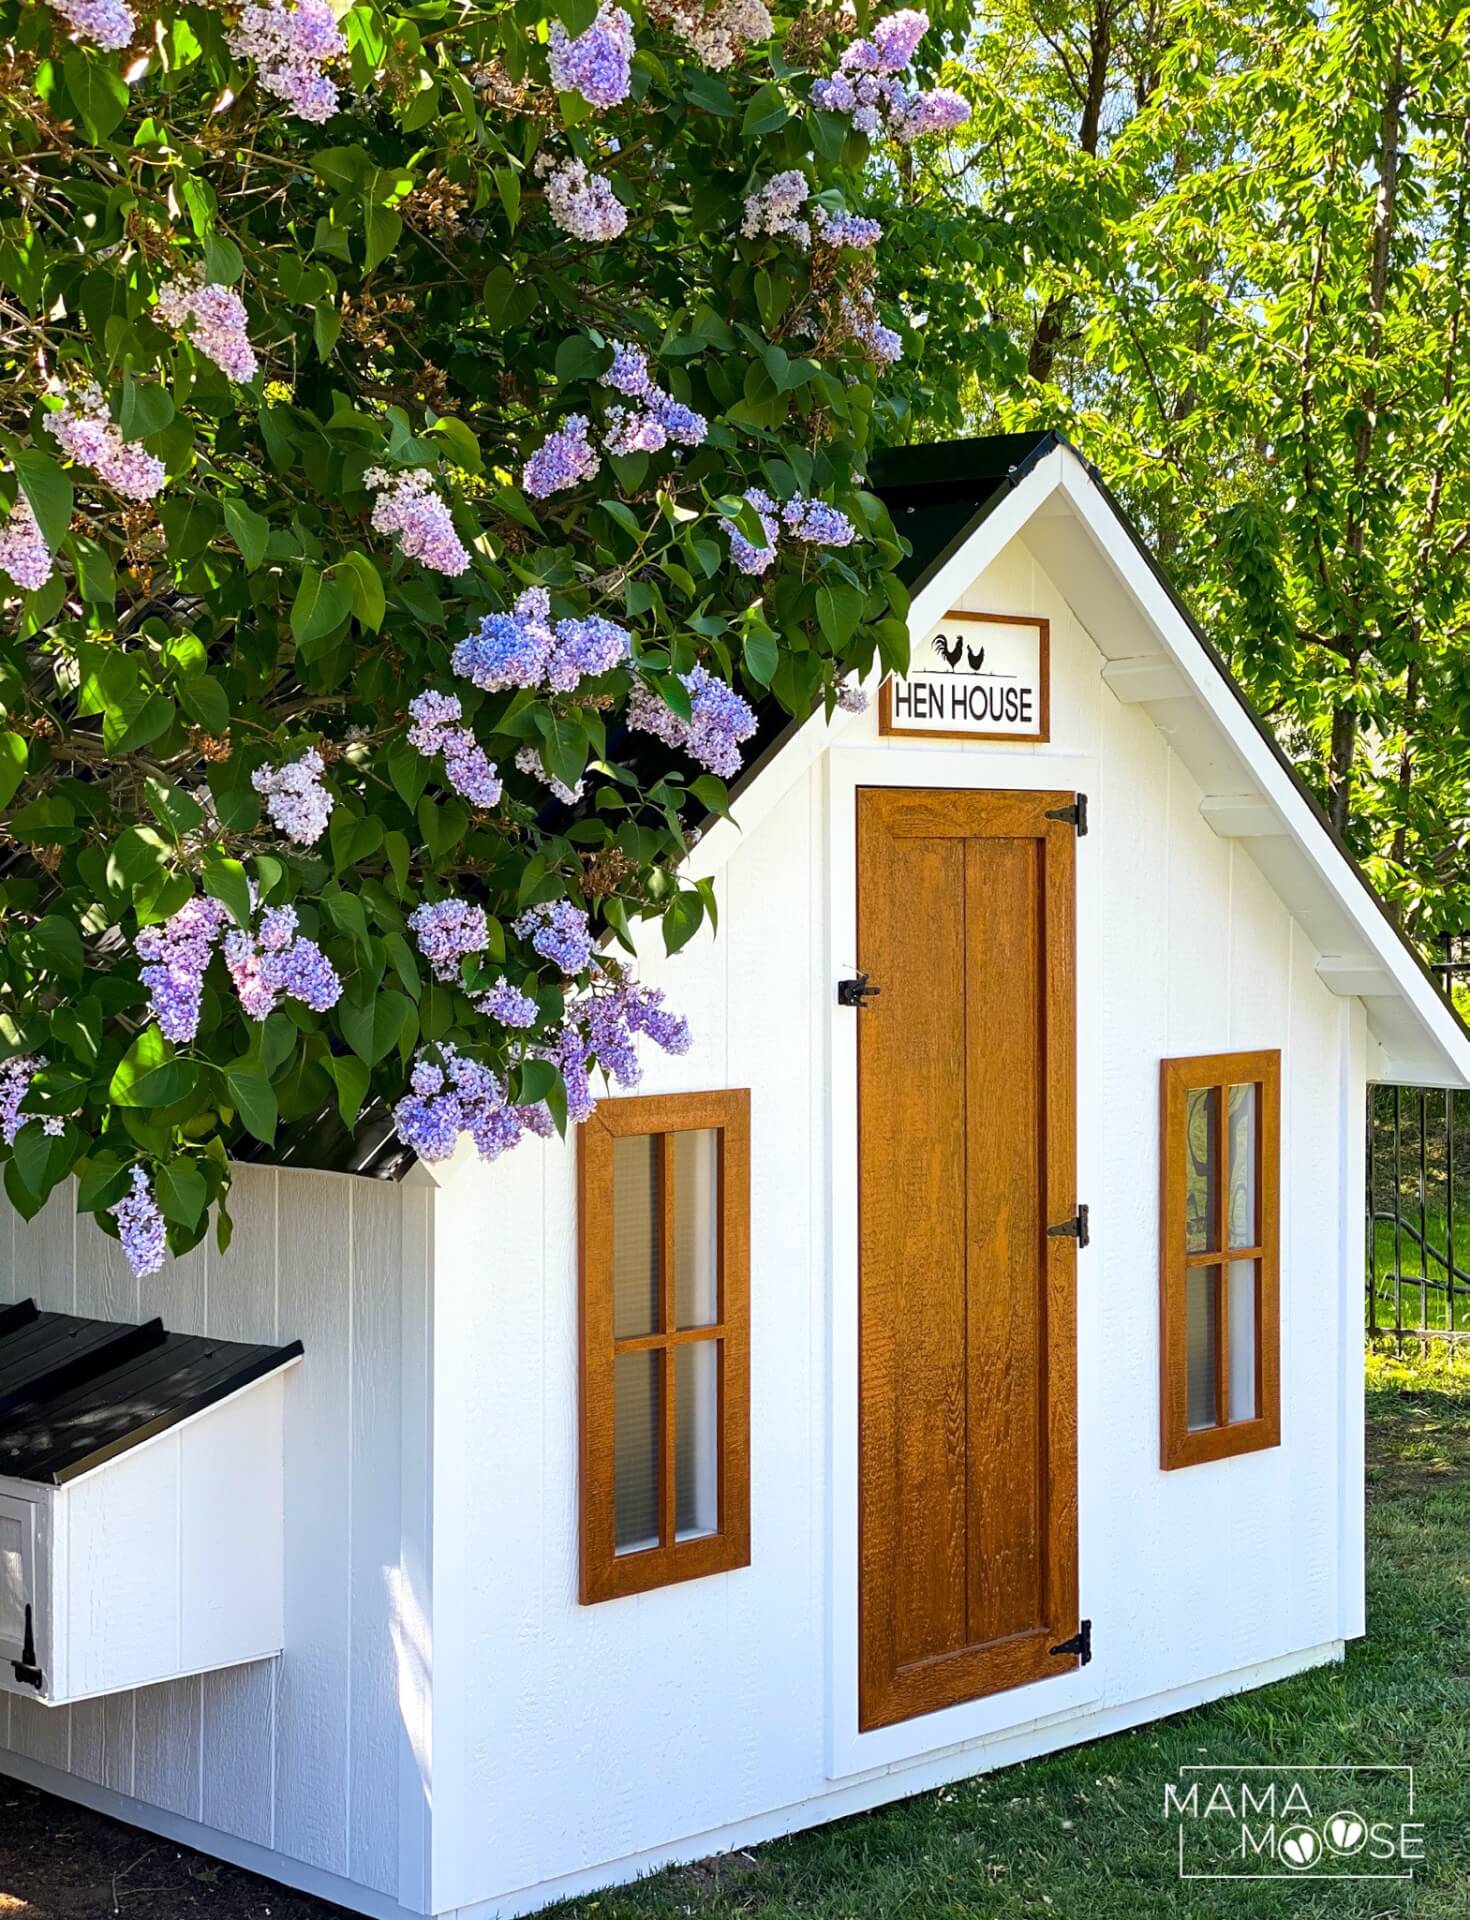
HEN HOUSE SIGN
Here is the “Hen House” sign that I created. Download the SVG and PDF of my design below.
Supplies:
- Trim Board
- White Exterior Paint
- Faux Wood Painting (details above)
- Hen House Template (below)
Use some of the extra trim boards and rip them with a table saw to be only 1/2″ wide. Grab some 1/4″ MDF board and cut it to be 8.5″ x 17″. Paint that with TWO coats of white paint.
Cut the trim pieces: (2) 8.5″ in length and (2) 18″ in length. Paint them the exact same as you did for the door and window frames.

Now cut your vinyl and attach to the sign. To attach the hen house sign to the coop, I just used a nail gun to secure all corners to the coop.


You need to send this to a Country Living magazine – it’s amazing.