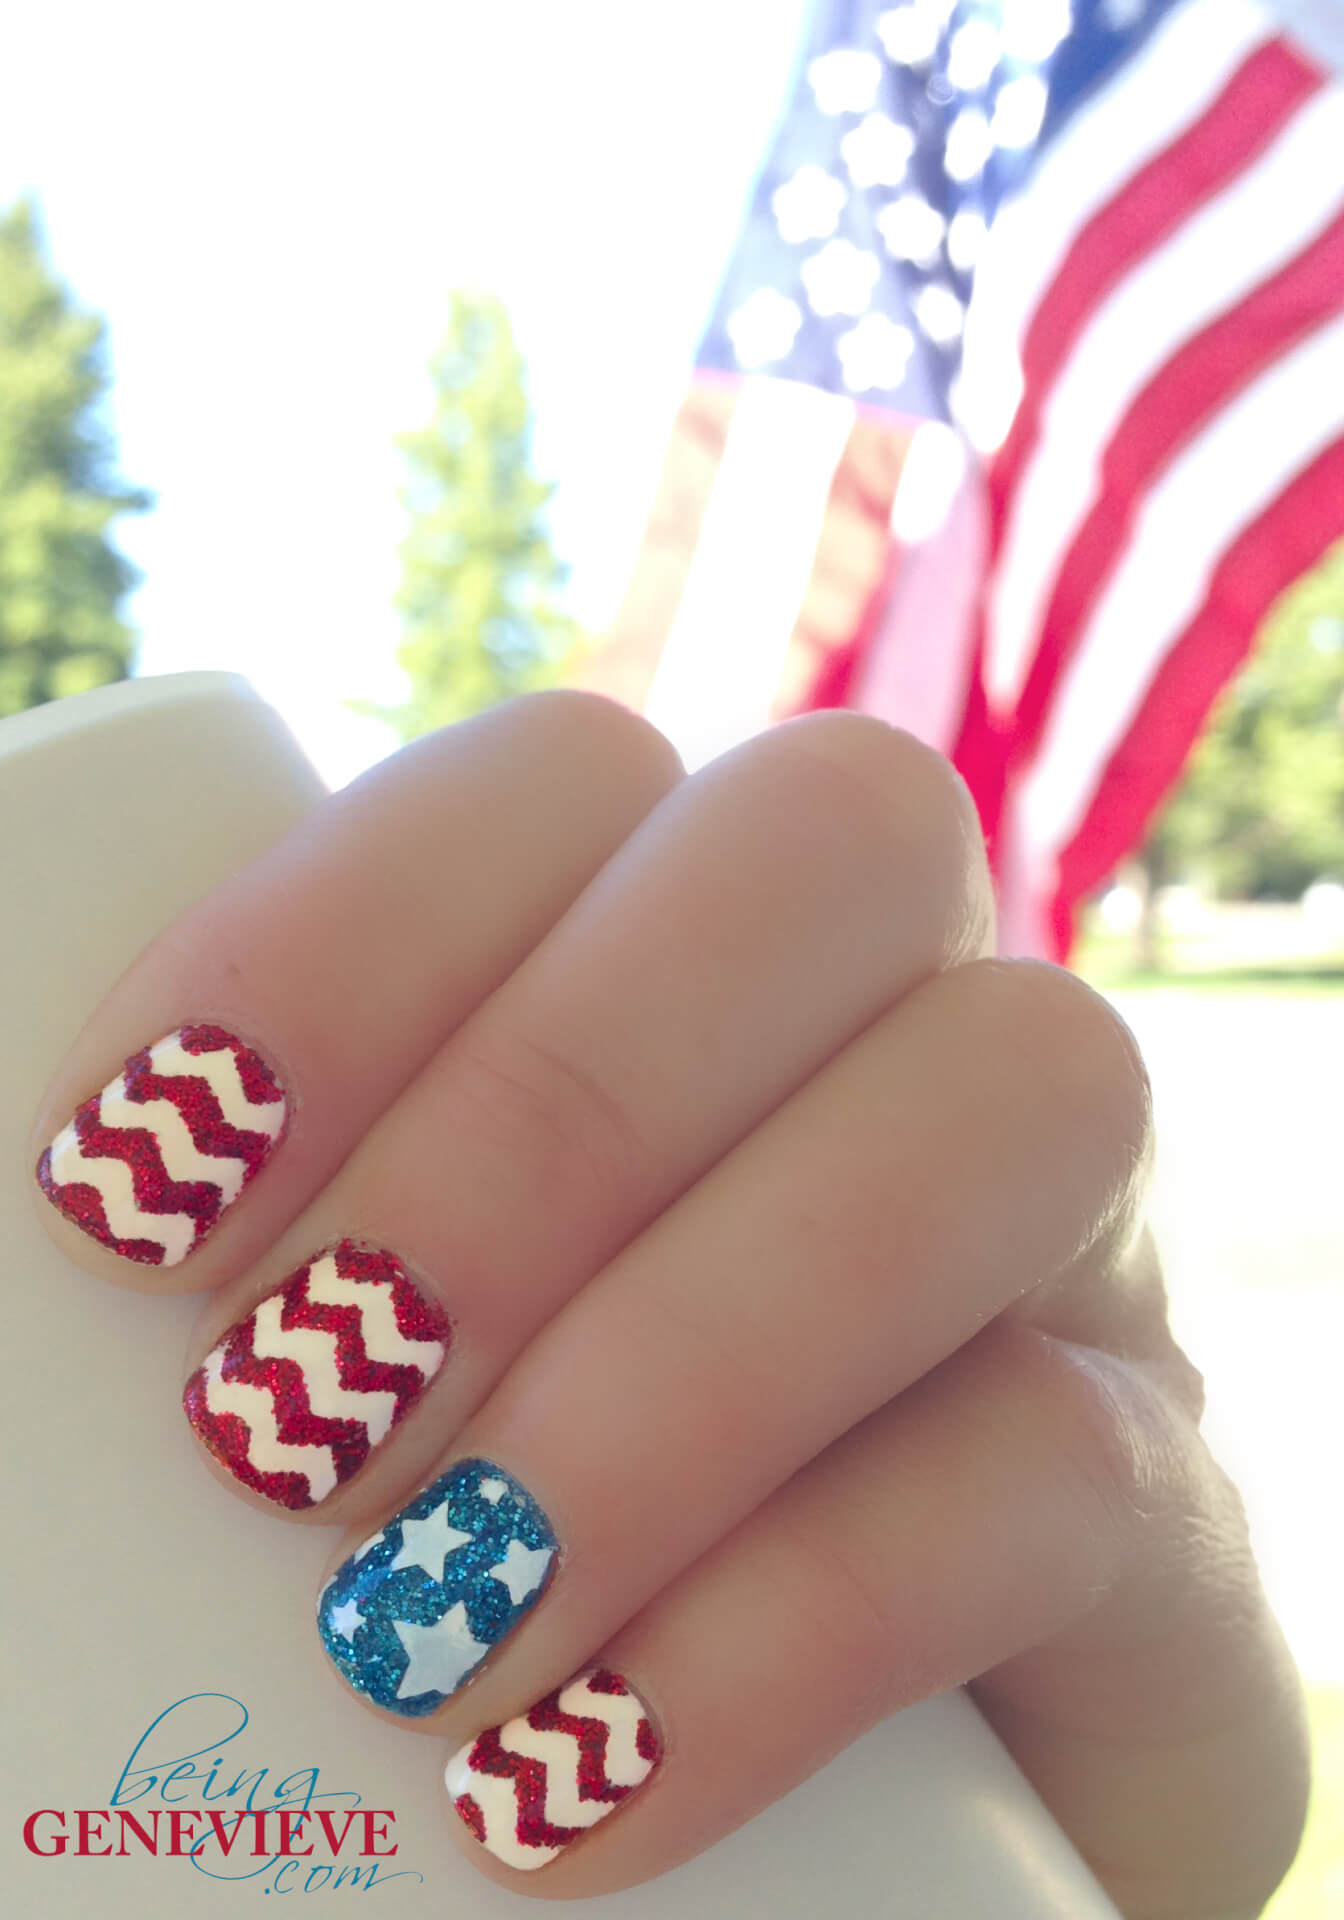
I am getting so excited for the 4th of July celebrations tomorrow! I love the 4th of July so much that I just couldn’t pass up an opportunity to do something patriotic on my nails. Some years I just play off the idea of red, white and blue. Other years I just do something with stars and stripes. This year I decided to do an actual flag on my nails. I am so excited to share with you this nail art design!
{I want to state that if I were to do this design again I would do one of the steps differently than I did. I will mention that step in the tutorial below and will bold the change.}
Note: I will be providing instructions on how to achieve this look with plain polish, along with Gel Polish.
Step 1: Prep Nails
View my post on Nail Polish Prep.
Step 2: Paint White Nails {Red Nails}
Paint all your nails with two coats of white polish. {This is where I would change and paint the nails red and sprinkle with glitter (garnet color), just as I did in step 3 with the blue polish.} I used the Shellac color called Cream Puff.
Gel Polish: Apply one coat white polish. Cure 2 minutes in the UV light, or 1 minute in an LED light. Apply second coat of white polish. Cure again for 2 minutes in the UV light, or 1 minute in an LED light.
Step 3: Paint Blue Nails
Paint the ring fingers with blue polish. I used the Shellac color called, Cerulean Sea. While the nail polish is still wet gently dust a fine layer of blue glitter onto the blue polish, just as I did for my Simply in Love nails. I used Martha Stewart craft glitter, color lapis lazuli.
Gel Polish: Apply one coat blue polish and dust the glitter. Cure 2 minutes in the UV light, or 1 minute in an LED light.


Step 4: Seal Glitter
Now apply top coat to all the nails to seal in the glitter. Before re-dipping your brush into the polish, after each nail, make sure there isn’t any glitter on it. If there is, wipe it on a paper towel to remove the glitter. You don’t want to contaminate your polish. Don’t worry about the glitter around your nails. Once dry, it removes best if you just wash it off in the tub or sink just as you would do if you were doing glitter nails.
Gel Polish: Paint top coat onto the nails. Cure 2 minutes in the UV light, or 1 minute in an LED light.
Step 5: Chevron Stripes
Stick a chevron vinyl guide onto your nails. Note: I just cut my own with my craft cutter, but I have heard that you can buy chevron tape or you could cut scotch tape with pinking shears. Paint top coat and sprinkle with red glitter. {If you painted your nails with red and glitter, like I mentioned I would above, than just paint white polish.} Remove guides.
****Note: Doing it like I did, can make it tricky to keep the red glitter off of the white polish. But if you have your entire nail red glitter and then paint white over the top you should have no problem with stray glitters and achieve a more perfect look than I did.****
Gel Polish: Cure top coat with red glitter {or white polish} in UV light for 2 minutes. 


Step 6: Stamp Stars
Stamp blue nails with white stars. I used the nail stamp MASH #49.
Step 7: Apply Final Top Coat
Now apply your top coat. Make sure the paint is completely dry before adding top coat to help avoid smearing.
Gel Polish: Apply top coat, only after paint is completely dry, and cure in UV light for 2 minutes.
Step 8: Allow to Dry and Apply Cuticle Oil
Allow your polish to dry completely. Apply a cuticle oil just around your nails on the cuticle and rub into the skin.
Gel Polish: Remove sticky residue on top of nails with a little alcohol or polish remover and apply cuticle oil.
Remove gel polish after 2-3 weeks, check out Gel Polish Removal for the quickest, easiest and best way to remove gels.


