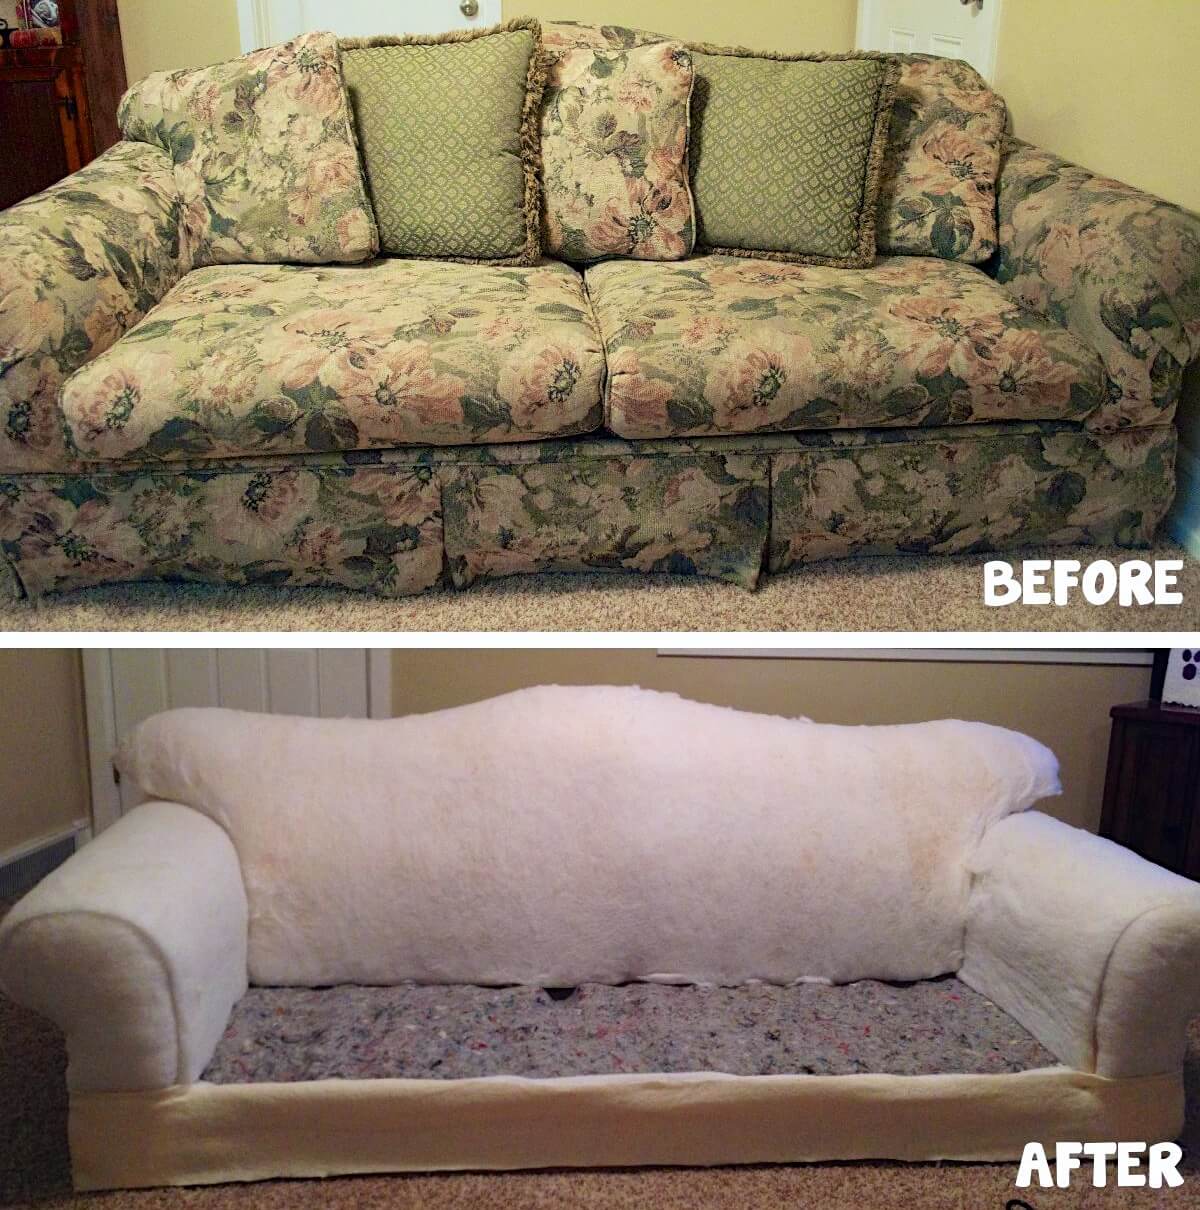
Alright now that you know everything you need to about getting started with upholstery; Let’s begin ripping the fabric off! Note: Every piece of furniture is different, so I will be giving just a general approach that should work for most items.
Step 1: Gather supplies to begin taking the old fabric off.
After much trial and error, this is what I recommend to have with you when ripping out the staples of the old fabric.
- Pliers
- 4 1nch Tack Puller
- Mason Jar
- Magic Marker
- Camera/Camera Phone
- Band-aids
I stumbled across a tack puller while taking apart my second upholstery project. I had read on many blogs that a screw driver was the best way to remove old staples. Believe me, several injuries later, that is false. I went to Home Depot and asked every associate I could find what I could use instead. I found this beauty! Pliers will help with those stubborn staples. Mason jar will help hold old staples. Magic marker is needed to label all the fabric coming off. Note: You will use old fabric as a patten piece to cut out new fabric. Camera/Phone will be useful in taking pictures of those hard to remember parts (will make more sense later). Band-aids, no matter how careful you are, you will probably need at least one of these before you get done.
Step 2: Here is how to remove the old staples.
Place tack puller underneath the staple and lift out. If you have a stubborn staple, lift it slightly so that the pliers can pull it out without damaging the fabric. (Fabric needs to be in good condition to use as a pattern piece later.) Don’t leave any staples behind. They could get in your way and possible ruin your new fabric when reupholstering.
Step 3: Start at bottom and work up.
*If your furniture has removable legs or a swivel bottom remove before beginning. Also remove all cushions and pillows that aren’t attached*
Begin by taking off the bottom cover. If in great condition, I save this to use on my newly upholstered furniture. It goes on the bottom and is never seen so it shouldn’t matter. Just remember to vacuum it off well.
After you remove the bottom cover you will see what needs to come off next. For example: my couch was the bottom, then the ruffle, the piping, the back, side of arms, back cushion, arms, seat area (place underneath cushions). *I make a list of what order it came off so that I know what order to put it back on.*
Step 4: Back and sides most likely not held with staples.
Along the sides of the back and the side of the arms you most likely will not find staples. These are held down with a metal nail form or curve ease ply grip.
I remove these by using my tack puller to bend it out of the wood of the furniture. Once removed out of wood, take out of fabric and throw away. Neither of these items can be re-used.


Step 5: Label all fabric with magic marker as it comes off.
As I said above, the fabric that comes off will be your pattern piece for the new fabric that goes on. I label mine with a name of the piece, an arrow showing which way is up, and any important things I may need to know. Such as, add 6″ to length of fabric or I may draw a line of a place I will be changing from the original couch design. (I decided not to keep the folds on the front arms of the couch so I drew a line of where I would be adding piping.)
Step 6: Take pictures!
When removing fabric you may come across folds or something else that may be hard to remember when it comes time to put everything back on. I had folds on the top back of my couch that I wanted to remember. I took a picture so that when it came time to put my new fabric on I could refer to the picture.
After several hours of good movie watching/listening, a mason jar full of staples and some patience, all the old fabric will be removed from your furniture. Time you will spent removing staples depends on size of furniture. My 7′ couch took 7 hours. My 5′ love seat took 5 hours.
Nothing is more exciting than having all the fabric off. Removing fabric is the worst part. Putting it back together is when the fun begins. Now you are ready to put all the new fabric on. I hope this has helped you know how to remove all that old fabric from your furniture. I’m excited to begin putting my couches back together!
Check back later for the post on, Reupholstery: Put It Together. Or if you need to know how to get started before taking off all the old fabric check out, Reupholstery: Getting Started.


It’s really a nice and helpful piece of information. I wanted to say that I have really enjoyed browsing your blog post. Your blog is very informative. Keep posting.