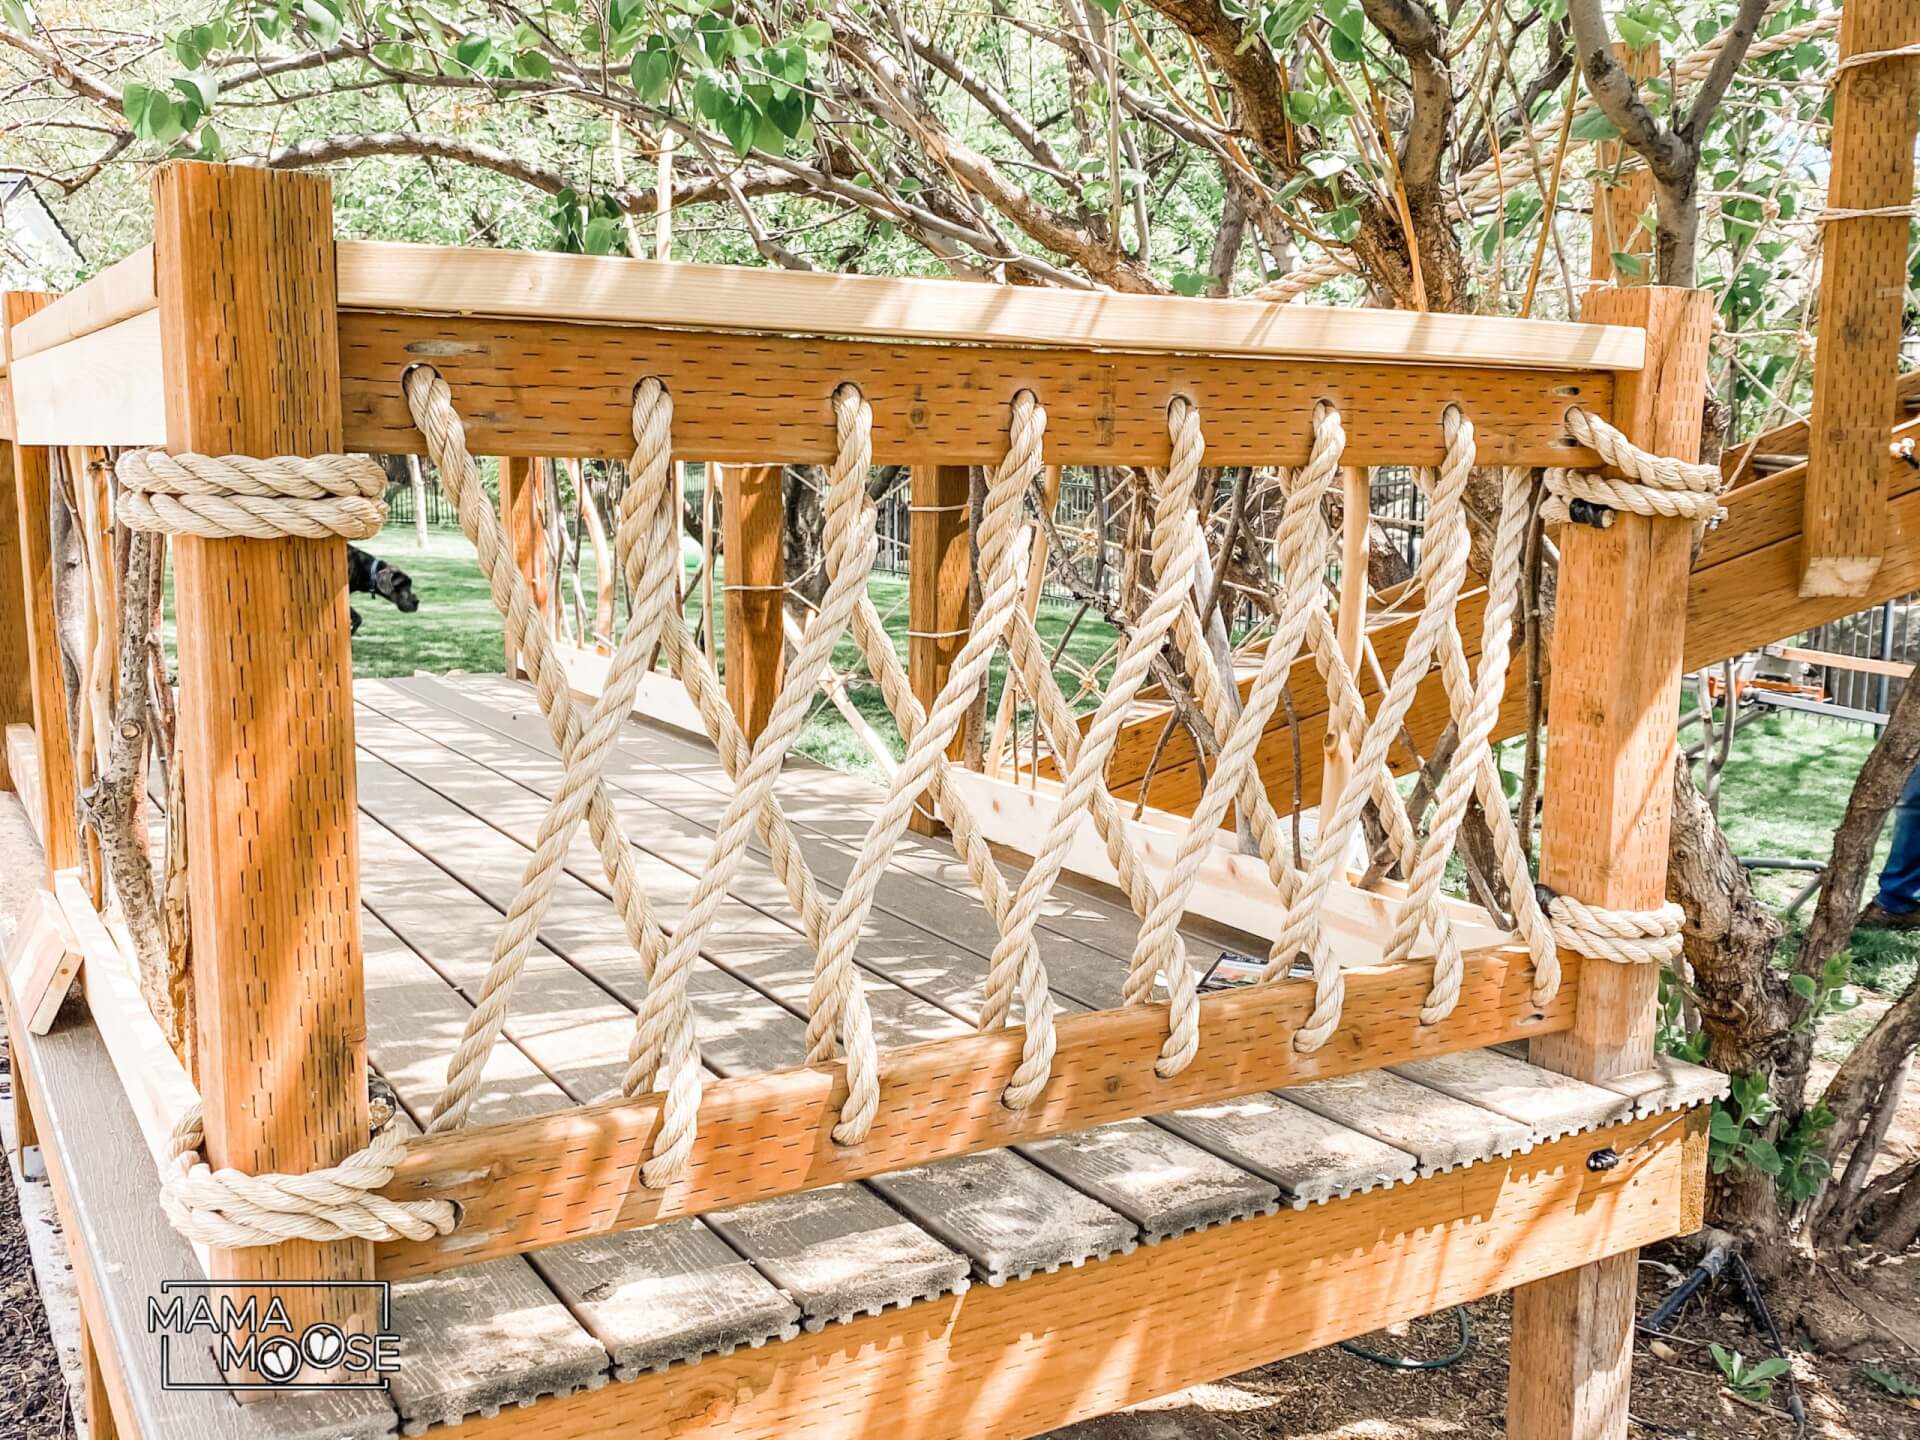
On our treehouse every other opening of the railing was done with a coastal rope wrapping technique that took me a few weeks to figure out just how I wanted to do it. I looked around online hoping to find another post about how to do what I was envisioning in my head, but after hours of searching I didn’t find anything. So, I thought this wrapping technique was something that had to be shared!

Supplies
Wood
Our railings were made with pressure treated wood. The posts are 4×4’s. The top and bottom railings are 2×4’s. The top railing had an extra 2×4, that is not pressure treated wood, attached on top because pressure treated wood can cause splinters.
Rope
I used 1″ polypropylene rope. You want to use polypropylene rope because it can handle getting wet, freezing and the many elements without breaking down and stretching out.
Tape
You will need to use electrical tape to secure all your ends. Electrical tape comes in all colors, but I decided to just use the standard black. I wrapped my rope in electrical tape about 3-4″ long where I cut the rope and cut in the center of the tape. Then both sides of the rope where it was cut will be secured and not fray. I used loppers to cut the rope.


Screws
The rope will be attached using deck screws. Once the screw is drilled into the rope you can pull the threads of the rope over the screw to hide it.


Step 1: Holes
Now for the holes where the rope will be fed through . . .
I began by measuring where the center of the railing was and marked it. I then measured out 6″ and marked that. I continued until both the top and bottom railings were marked every 6″.
We used a 1″ hole drilling bit.


Step 2: Technique
Now for wrapping the rope. I hand drew a little diagram to help explain how I wrapped the rope. I have attached the image below.

Step 3: Wrapping
The coastal rope railing will take two pieces of rope. I begin by wrapping the first piece of rope loosely through every other hole, just as I did in the picture below. I attach the cut end of the rope to the post using deck screws. I pull the rope a little tighter and cut the rope. Remember to wrap the rope in the electrical tape before cutting. Now pull the rope very tight and secure with deck screws.


Now you will be wrapping the second piece of rope, just as you did the first piece, but PAY CLOSE ATTENTION to which rope needs to be in front at each twist. You will notice in the video, at the bottom of this post, that I wasn’t paying attention and wrapped the end of my second piece incorrectly and had to rewrap it.
Step 4: Secure Rope
Once both pieces of rope are wrapped, pulled tight and secured. I secure the rope again in the places where it is wrapped around the posts. In the pictures below, you will see that the ropes twisted around the post hangs separated. I wanted my ropes around the post to hang securely together so I attached another deck screw to keep them together.


I put together a quick little video on me creating this look. You will notice that it can easily be done with just one person. To wrap this section of the railing it only took me about 20 minutes. I sped up this video so you could see it all done in just a couple of minutes.
Thank you for stopping by and I hope this post was helpful.


Thank you for this detailed description and video! I have been looking for something like this, and had to undo the whole railing that I tried to finagle on my own. One question: how do you hide the cut ends of the rope? Are the ends screwed in to the posts and covered over?
I’m not sure I understand your question … sorry. The ends are just screwed in to the post as shown in the post.
We love this!! What was the length of each rope used for your 4 foot section?
I’m not sure. As you can tell from the tutorial and the video I don’t cut the rope until after I wrap it. Sorry.
Great tutorial! Do you think 3/4” rope would work? Also, did you use all 100 feet of the rope?
Sorry for the late response. Something is broken on my site so I just saw this question. I bet 3/4″ would work. I personally would not go any smaller than 1″ myself. I almost wish mine was a little thicker. I actually used almost 200′ for our entire treehouse.