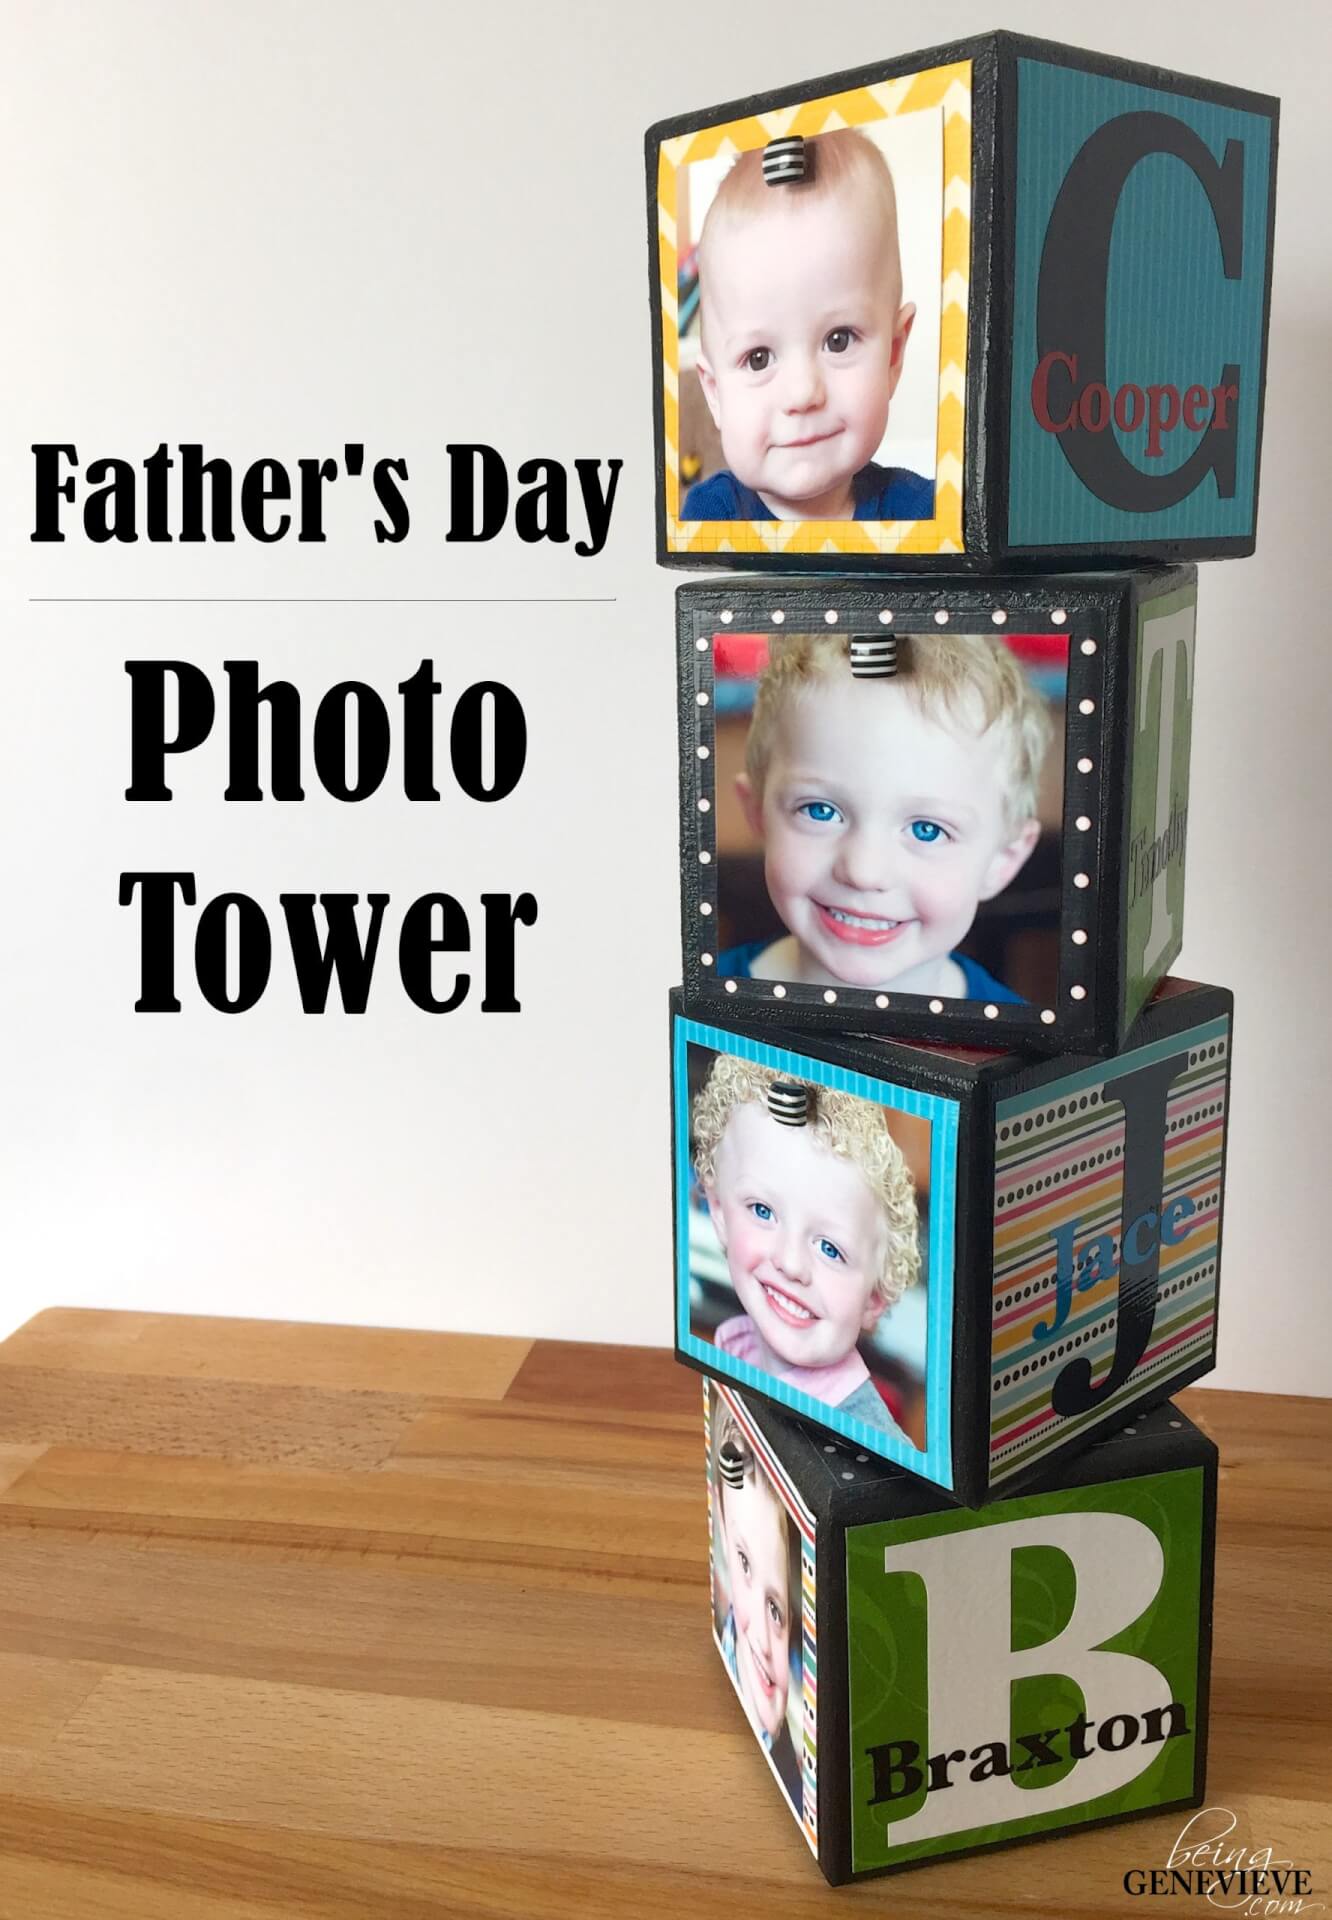
Last year, I stumbled across Amy from the happy scrap’s photo tower and absolutely loved the idea. My husband has very limited space at his work to display pictures of the kids and family. I knew immediately when I saw this it was a perfect idea for father’s day. BUT I did change a few things that Amy did. I didn’t do the nuts and bolts. I also didn’t stick the pictures to the blocks; I wanted the pictures to be able to be changed easily and possibly often. I didn’t do any father’s day words. We chose to do the kids’ names and initial on each block. Let’s get started . . .
Supplies
- Patterned Paper
- 3 1/2″ Wood Blocks, unfinished
- Black Acrylic Paint
- Mod Podge, matte finish
- Sponge Brush
- E-6000 Epoxy
- Magnetic Metal Sheet
- Metal Shears
- Mini Magnets, Super Strong
- Mini Craft Buttons
Step 1: Paint Blocks
Paint all the edges of the blocks with acrylic craft paint. (There is no need to paint the entire block considering you will be covering most of the block with paper.)

Step 2: Metal Sheets
I found this magnetic metal sheet at the craft store, Hobby Lobby. Measure 3″ squares and cut with metal cutting shears.
Note: I applied metal sheets to only 2/6 of the wood block sides. I did the top side and the bottom side. 

Apply E-6000 to the back on the metal and push onto the block. Lay that side face down onto a flat surface and glue another metal sheet onto the top of the block. Then add a heavy can or jar to help push the metal firmly onto the block. Let it dry overnight to ensure maximum hold.


Step 3: Patterned Paper
Cut patterned scrapbook paper into 3″ squares. Cut enough paper squares to cover all 6 sides of the block. Adhere paper onto all sides, even the metal sides, with mod podge. If you are new to doing this, please follow my step-by-step tutorial found here, there are a few tricks to do, so that the paper doesn’t bubble up and become lumpy. Once it becomes lumpy, there is nothing to do to fix it; You need to apply it correctly the first time.

Step 4: Tower Building
Now I played around with the blocks a little bit to see how I wanted them to face. After you figure out your arrangement; place a small amount of E-6000 on the center of the side that will be sticking to the other block.
NOTE: Make sure that you don’t glue your magnetic side to another block. You want the magnetic sides to be facing out.

Remember that after you glue the blocks together, place something heavy on top and let it dry overnight to ensure a good bond.
Step 5: Magnets
To make my magnets, I bought these amazingly super strong mini magnets at a craft store, along with these adorable mini decorative button stickers. Dip the magnet into some E-6000 and place onto back of button. Let dry overnight.

Step 6: Vinyl
For the vinyl, cut out the first initial of your child’s name 2.75″ height and their name .53″ height. You will need 2 of each of these, per block.
Note: I used the font Baskerville.
Apply the initial first, followed by the name. Make sure not to apply the vinyl to the magnetic sides. I placed a picture on the magnetic sides so that I wouldn’t accidentally stick the vinyl on the wrong sides.

For our blocks, we did different colored vinyl for each side. Just be creative and have fun making this special.

Step 7: Photos
Now you are ready to print some adorable pictures of your kids and attach them with your mini magnets. You will love that you can change these pictures out as often as you like with the ease of just taking off the magnet.

Note: I printed our pictures to be 2.75″ squares. You can print 2 pictures of your child to put on both sides of their block. I decided to do something different, I printed pictures of our dog, just my hubby and me, kid only picture and a family selfie shot to put on the back side of the blocks. Since these are magnetic and can be changed, you aren’t locked into anything.


