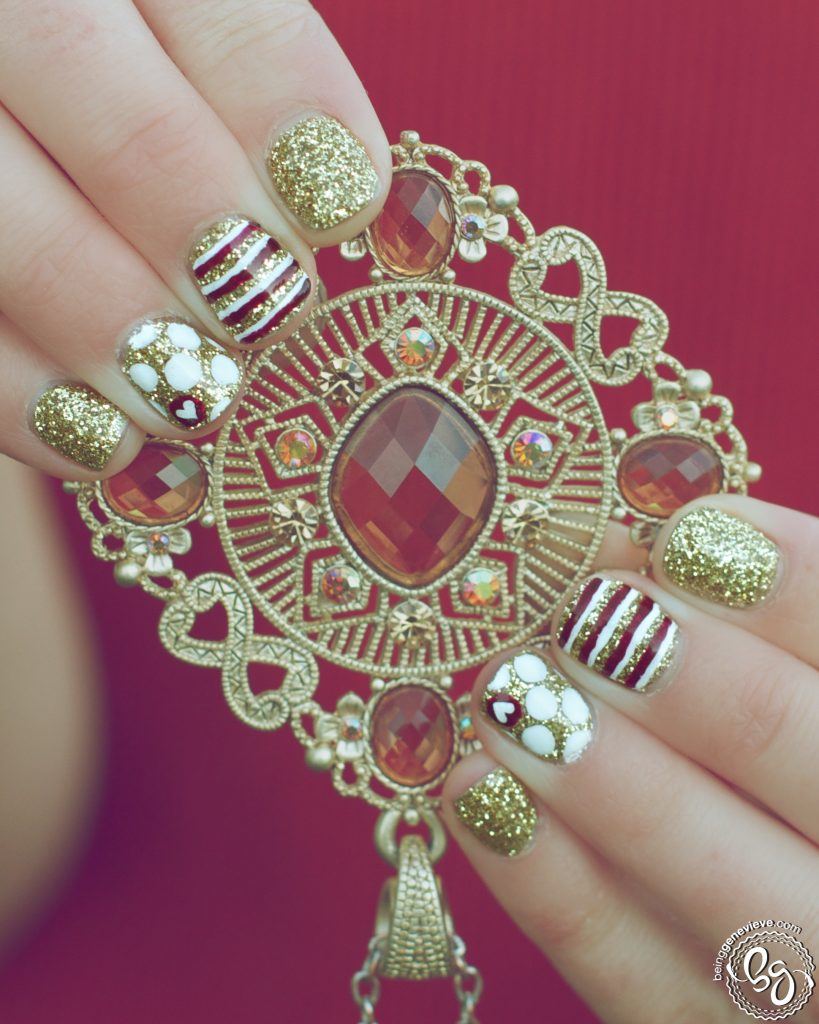
Two months ago, I paint my nails in this golden girl design. It is one of the few designs, that I have done, that I received compliments on my nails several times a day. Who doesn’t love glittery gold nail polish??? Since fall is now here I decided that it was time for me to do another glittery gold nail design.
Note: I will be providing instructions on how to achieve this look with plain polish, along with Gel Polish.
Step 1: Prep Nails
View my post on Nail Polish Prep.
Step 2: Paint Gold Nails
Paint all of the nails with two coats of gold polish. I used the Shellac color called, Locket Love. While the second coat of polish is still wet gently dust a fine layer of gold glitter onto the polish, just as I did for my Simply in Love nails. I used Martha Stewart craft glitter
Gel Polish: Apply one coat gold polish and cure in light. Paint second coat and dust the glitter. Cure 2 minutes in the UV light, or 1 minute in an LED light.
Step 3: Seal Glitter
Now apply top coat to all the glitter nails to seal in the glitter. Before re-dipping your brush into the polish, after each nail, make sure there isn’t any glitter on it. If there is, wipe it on a paper towel to remove the glitter. You don’t want to contaminate your polish. Don’t worry about the glitter around your nails. Once dry, it removes best if you just wash it off in the tub or sink just as you would do if you were doing glitter nails.
Gel Polish: Paint top coat onto the nails. Cure 2 minutes in the UV light, or 1 minute in an LED light.
Step 4: Paint Stripes, Polka-dots and Hearts
Middles Fingers – Free-hand {or use tape as guides} stripes with white acrylic paint and a dark red polish. I used the Shellac color called Masquerade.
Ring Fingers – Paint large white polka-dots using the white acrylic paint, replacing one of the white dots to dark red. Note: To paint perfect polka-dots view here.
Gel Polish: Cure the dark red polish in the UV light for 1 minutes.
After the polish is cured, paint a mini white heart on top of the dark red polka-dot. Note: To paint a heart with polish view here.
Step 5: Apply Final Top Coat
Now apply your top coat. Make sure the paint is completely dry before adding top coat to help avoid smearing.
Gel Polish: Apply top coat, only after paint is completely dry, and cure in UV light for 2 minutes.
Step 6: Allow to Dry and Apply Cuticle Oil
Allow your polish to dry completely. Apply a cuticle oil just around your nails on the cuticle and rub into the skin.
Gel Polish: Remove sticky residue on top of nails with a little alcohol or polish remover and apply cuticle oil.
