I stumbled across this quote many years ago and instantly knew I wanted it in my home somewhere, I just didn’t know where exactly. When I made my kids’ customized magnetic chore charts and needed a place to put the extra unused magnets I knew this is where I could incorporate this quote from Thomas Edison.


Purchase Vinyl
Purchase Completed Framed Opportunity Sign
Now to get started . . .
Supplies
- Clearance Board
- Behr Alkyd Semi-Gloss White Enamel
- Vinyl (download template below)
- Wood Stain, optional
- Galvanized Sheet Metal, optional
- Tin Snips, optional
- E6000 or Liquid Nails, optional
- Putty, optional
Step 1: Buy Clearance Sign
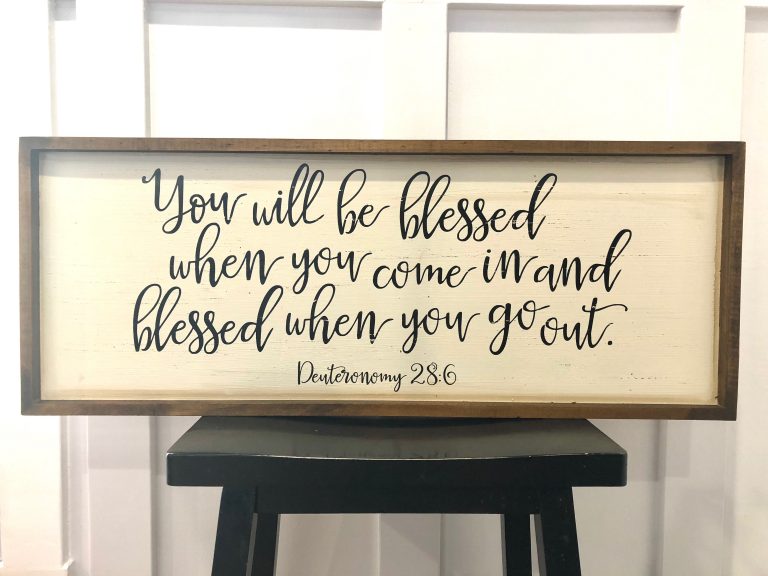
I started by going to Hobby Lobby and looking at all their signs that were 50% off. I really didn’t care what the sign looked like or said, I was just looking for a certain size and frame color. I found this beauty for only $8.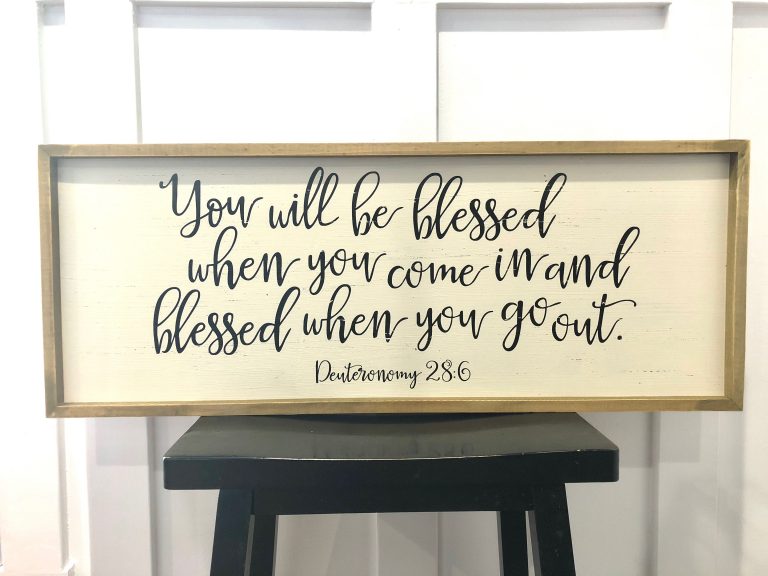

Step 2: Stain Frame
I didn’t love the blonde stain on the frame so I added a coat of Early American to darken it up a bit and to match my chore charts.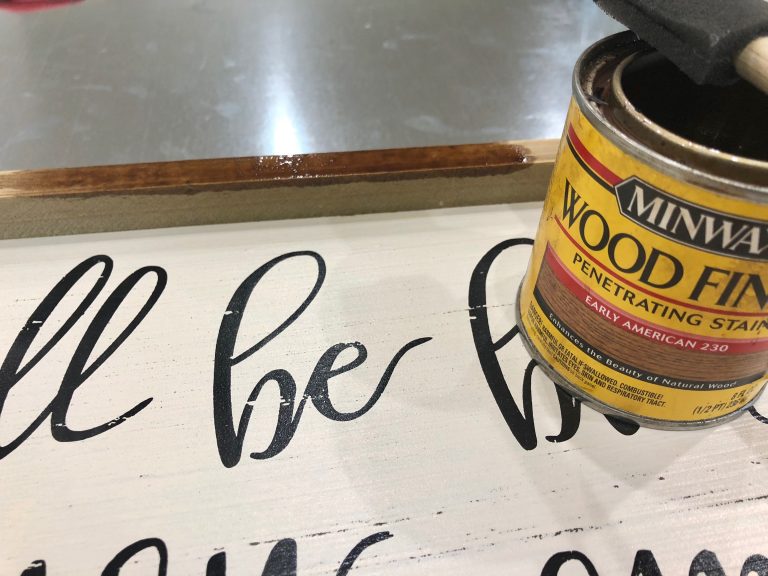

Step 3: Add Magnetic Metal Sheet, optional step
–Note: I made this particular sign magnetic because I needed something to hang above my magnetic chore charts to keep track of my unused chore magnets and have them easily accessible. So this step can be skipped if you don’t need this sign magnetic.–

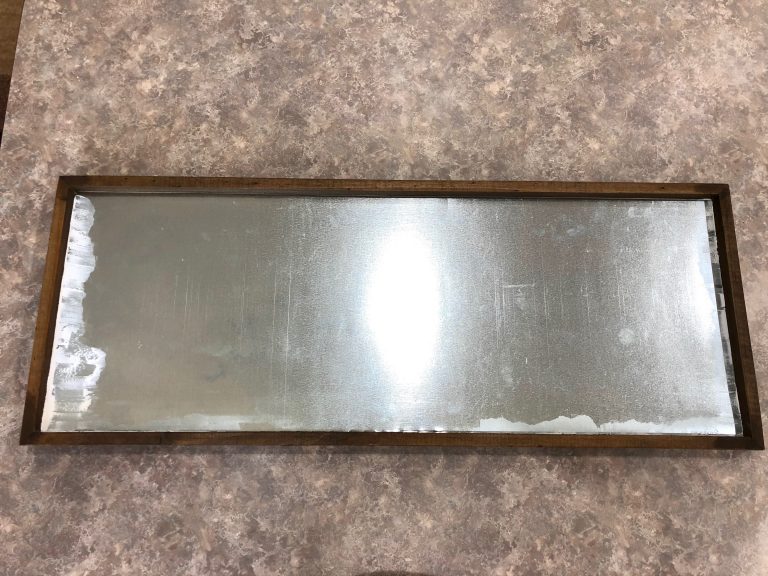
Now for the metal sheet. You can buy metal sheets at any craft store, but they are a little pricey to me and the sizes are very limited. So, I go to my local hardware store and purchase some galvanized sheet metal. Galvanized sheet metal is very inexpensive and comes in many different sizes. I usually buy a large sheet so that I can use it for several projects.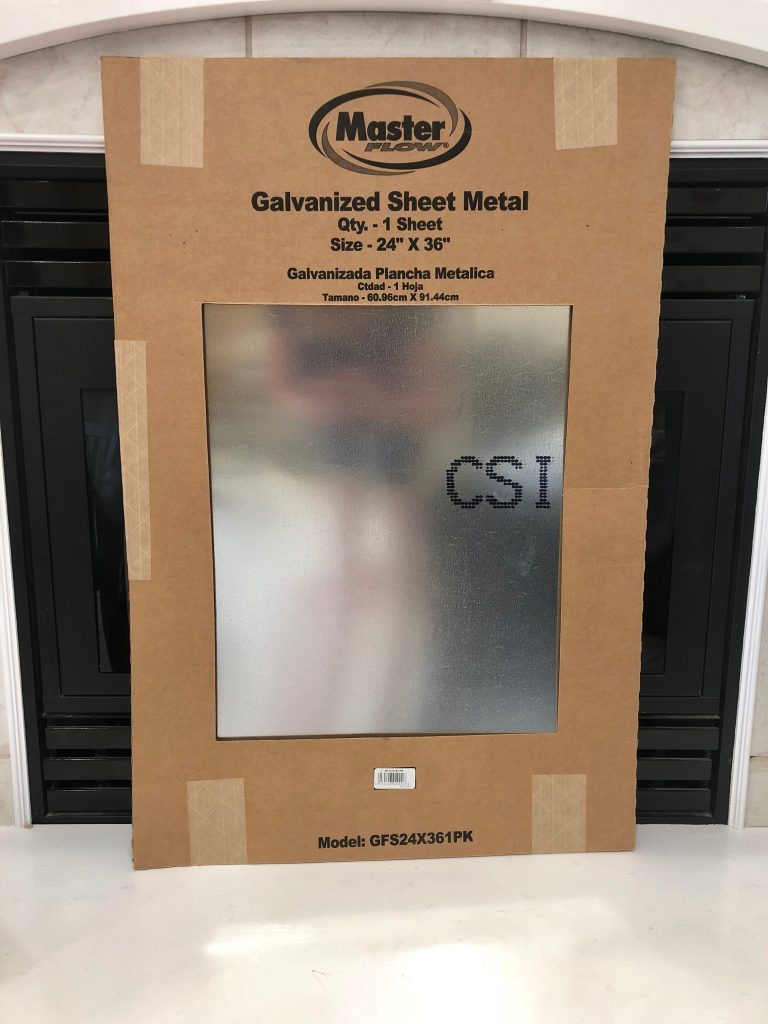

I placed my metal sheet on the frame and marked it with a permanent marker. I then used my tin snip scissors to cut the sheet metal.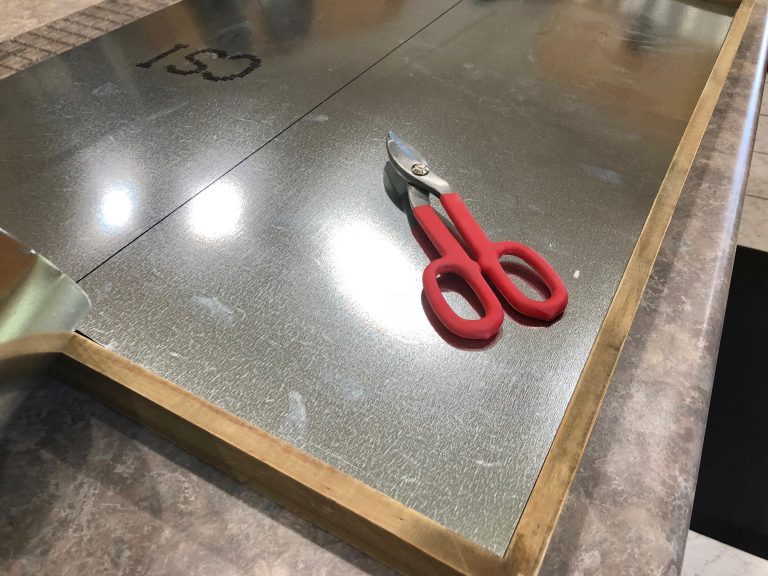
Now use some E-6000 or liquid nails to glue the metal sheet to your board.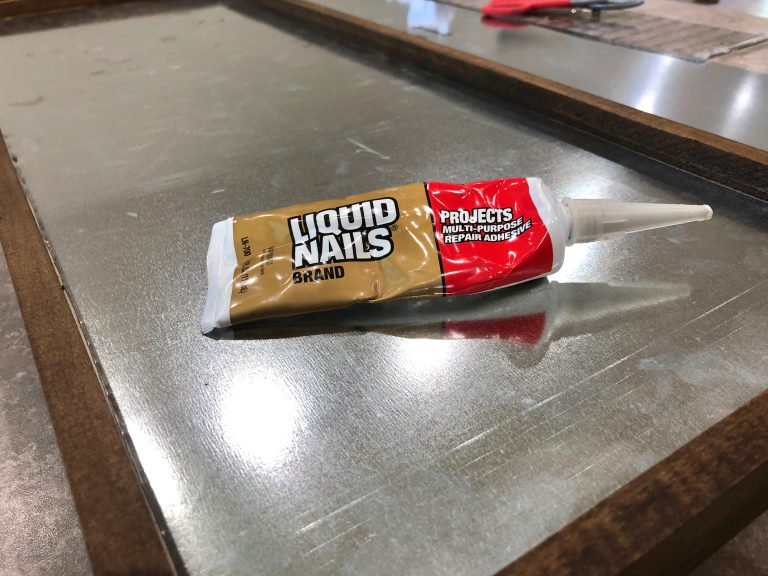
After gluing the metal sheet to the board, place something heavy (I like to use cans) on the metal sheet and let the glue dry and set up overnight. 
Step 4: Fixing Imperfections
I didn’t cut my metal perfectly and had a little space next to the frame so I grabbed my putty and filled the space in. I let that dry fully and then took my sandpaper and sanded it smooth.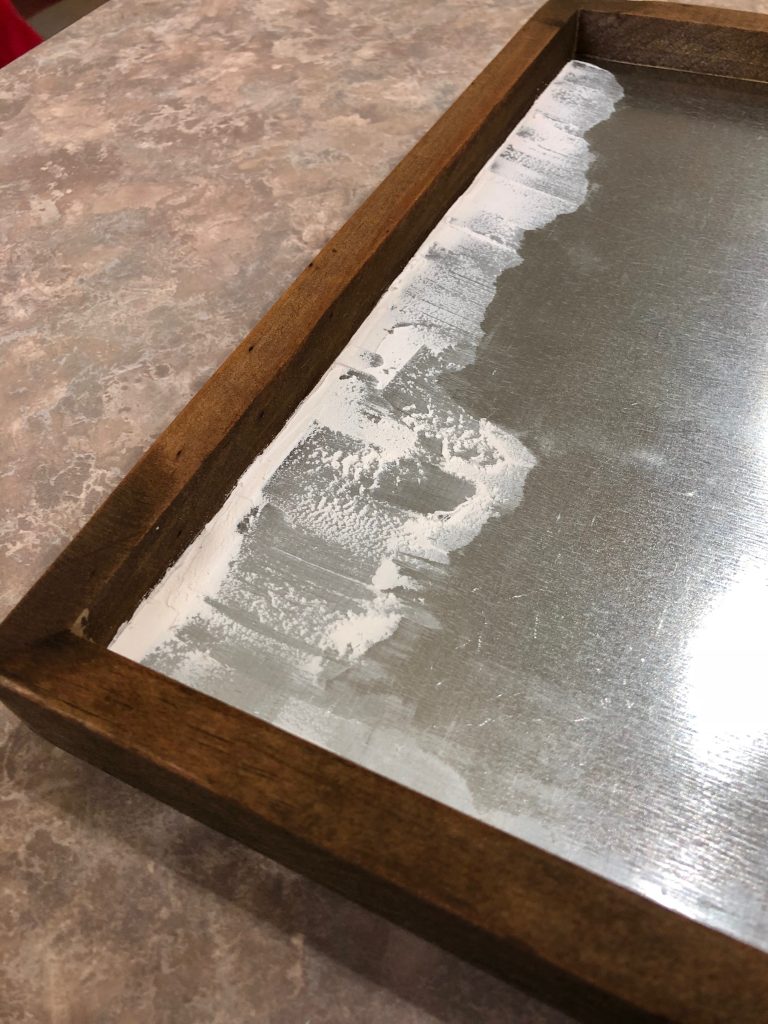

Step 5: Tape Frame & Paint
Once the putty has been smoothed and the surface cleaned of all dust, now all you have to do it tape off the frame with painters tape. I then painted two coats of white paint (as I did here) over the metal sheet.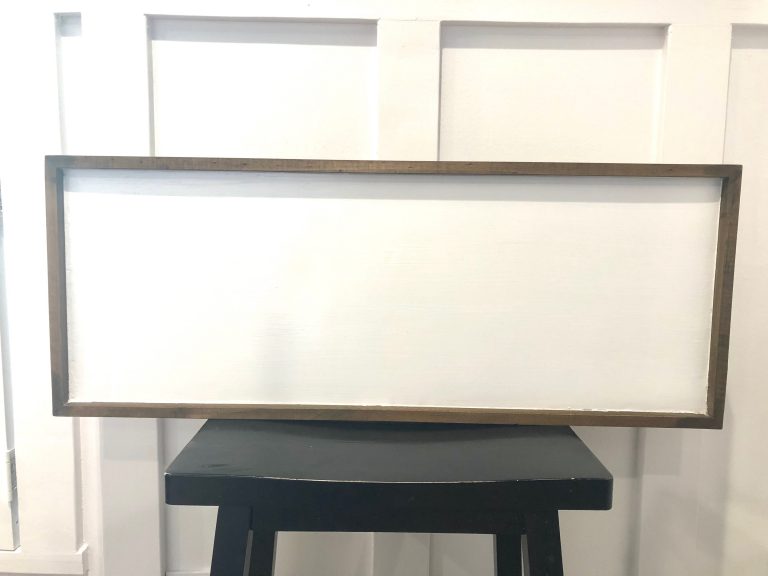
Step 6: Add Vinyl
Once the paint is completely dry (wait at least 24 hours), I decided how big I wanted to cut my vinyl. The SVG and PDF files can be downloaded below.
![]()
Now just apply the vinyl (here is my vinyl application method) and you are finished! Enjoy!