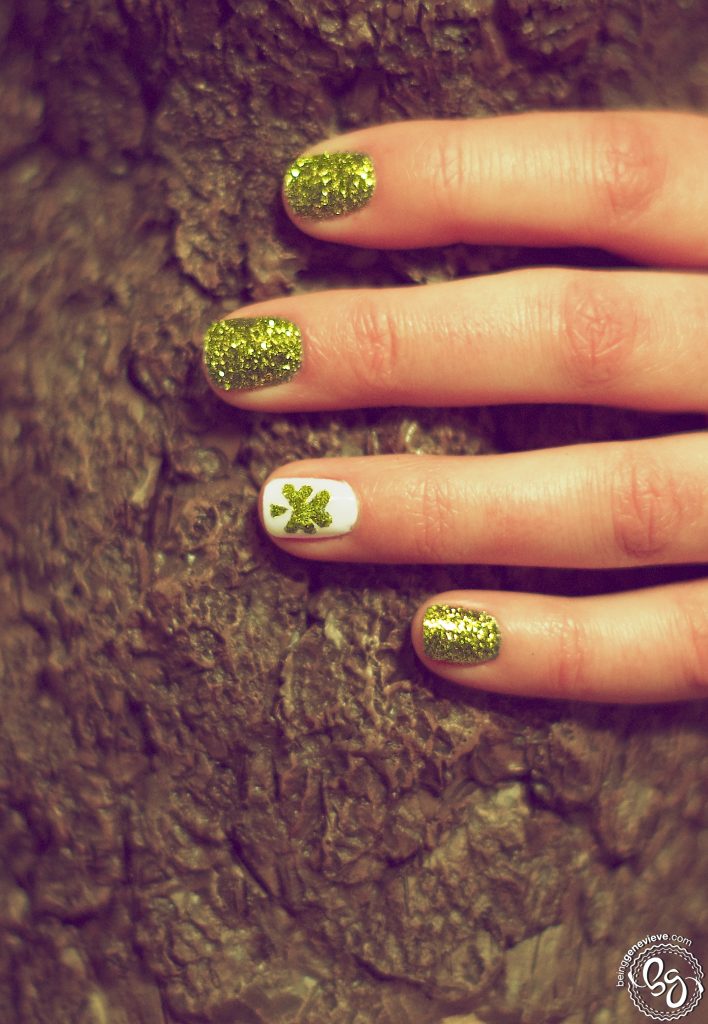
I have decided that I love doing glitter nails. I receive so many more compliments since they shimmer in the light. I have a glitter that is lime green that I have been dying to use on my fingers or toes, but have been waiting for St. Patrick’s Day to try it. Since my Valentine nail design, Simply In Love, was such a big hit I decided to do a very similar design for St. Patrick’s Day; Glitter nails with the white accent ring finger. Note: I will be providing instructions on how to achieve this look with plain polish, along with Shellac.
Step 1: Prep Nails
View my post on Nail Polish Prep.
Step 2: Apply Top Coat and Sprinkle Glitter
Apply a health amount of top coat to the dried base coat layer. Place a paper underneath your fingers and sprinkle green, Golden Beryl by Martha Stewart, glitter (view my glitter toes for more detailed instructions) to the wet top coat. Let the top coat polish dry slightly with the glitter on it. Gently tap your nails on the paper to remove excess glitter. Note: Do not push glitter into polish. This creates the glitter to look smashed on your nail and it loses some of it’s sparkle.
Shellac: Apply top coat, sprinkle with glitter, and then cure in CND light for 2 minutes.
Step 3: Paint White Nails
Paint your ring fingers with 2 coats of white (Shellac Cream Puff).
Shellac: Apply one coat white polish. Cure 2 minutes in the CND light. Apply second coat of white polish. Cure again for 2 minutes in the CND light.
Step 4: Glitter Shamrock
I painted the shamrock with a cream colored acrylic paint for a guide. Painting a shamrock is just as easy as painting a heart. You will paint 3 hearts next to each other and then add a stem. (Picture below shows the easiest, best way to paint a polish heart.) Then pick up some top coat on a toothpick and paint on top of the shamrock. I decided I liked the look of the heart points touching better than separate. So I brought the heart points together, in the middle, when applying the top coat. Dust the shamrock with green glitter. I used Martha Stewart craft glitter
Step 5: Apply Top Coat
Now apply your top coat. Before re-dipping your brush into the polish, after each nail, make sure there isn’t any glitter on it. If there is, wipe it on a paper towel to remove the glitter. You don’t want to contaminate your polish. Don’t worry about the glitter around your nails. Once dry, it removes best if you just wash it off in the sink.
Shellac: Apply top coat and cure again in CND light for 2 minutes.
Step 6: Allow to Dry, Wash and Apply Cuticle Oil
Allow your polish to dry completely. Wash off the excess glitter. Then apply a cuticle oil just around your nails on the cuticle and rub into the skin. If once dry, you have a sharp glitter edge just use a gentle grit nail file to file the end. This will smooth the edge, but make sure the nails are COMPLETELY dry.
Shellac: Remove sticky residue on top of nails with a little alcohol or polish remover. Wash nails and apply cuticle oil.
