This year, the outside of our home couldn’t look more scrooge-like. I was almost embarrassed whenever someone driving or walking by saw me pulling into my drive. I just knew they were thinking, “she hasn’t put one christmas decoration out. Where is her christmas spirit?” Okay, so I bet they weren’t thinking that, but still. We have no lights up, no wreaths, no decorations on the porch, nothing.
We have put up christmas lights every year since we were married, but not this year. It’s a long story, but here it is in a nutshell. Last year the sides of our roof broke/fell right off the house (I saw it crash to the ground outside through the kitchen window), all the way around, I mean you could see right up into the attic of the house on all sides. Insane and extremely scary, I know! When this happened our christmas lights were attached to the gutters and all the lights were destroyed. (Tears) The home where we are currently living is a rental and we don’t want to go buy all new lights for the dimensions of this house, when we will be building a house in a year. Small enough nutshell?
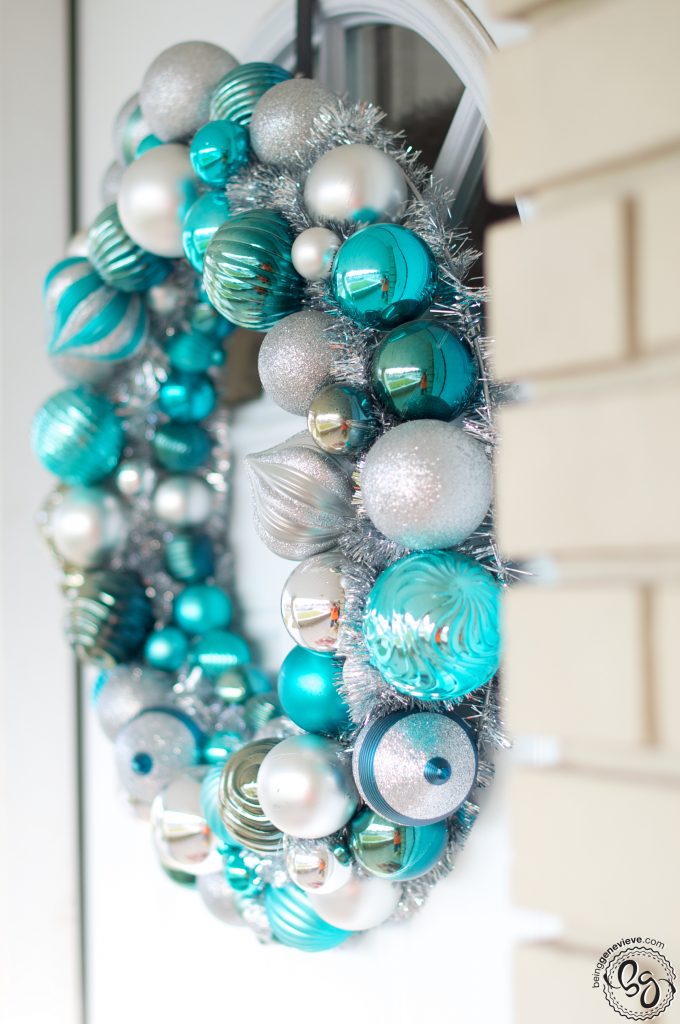
So earlier this week I couldn’t stand it any longer. We needed something on the outside of our home for the christmas season. So the boys and I started wandering Hobby Lobby hoping to find something that was very inexpensive, looked christmas-y and matched the colors of our ornament wreath on our front door. 
Here is what we found . . .
- 2 – 24″ Pine Wreaths, Fake ($9.99 then 50% off –> $4.98 each)
- Burlap Ribbon, 5″ width ($5.99 then 40% off –> $3.60)
- Blue Deco Mesh Ribbon ($9.99 then 50% off –> $4.98)
- Silver Edged Ribbon ($7.99 then 50% off –> $3.98)
- 2 – Suction Cup Wreath Hangers ($1.99 each)
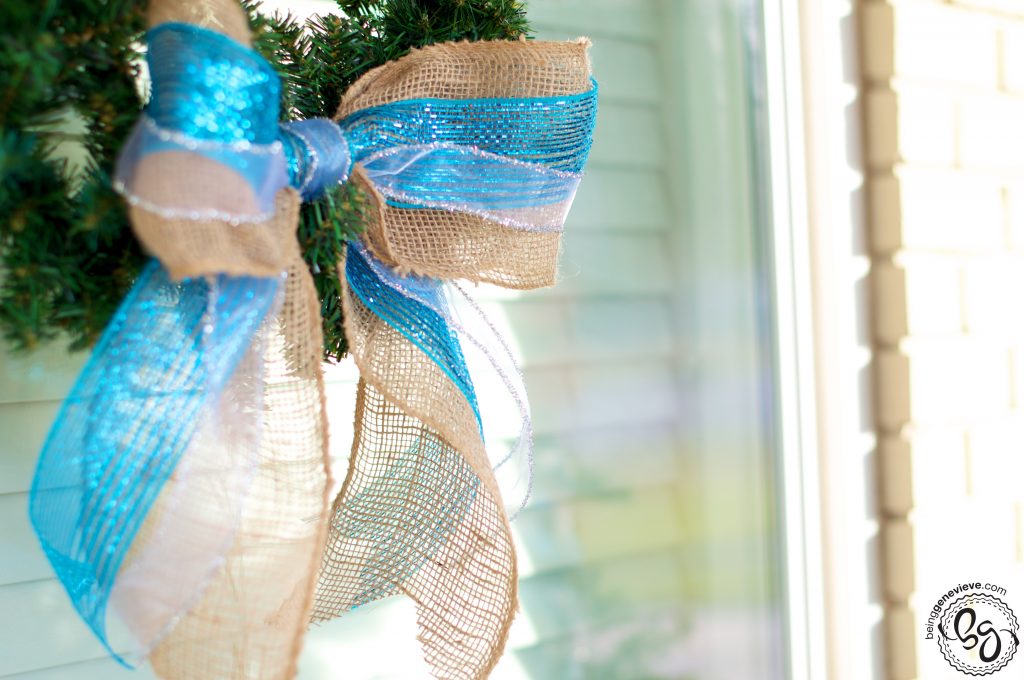
So for a little christmas cheer it cost $26, not bad in my mind! To dress up the plain wreaths I added a multiple layered ribbon bow to the front. A very easy, clean, simple look and it tied in the colors of our front door wreath.
Here is the best way {to me} to achieve this simple, but perfect bow. . .
Detailed Instructions
I began by cutting a piece of all three ribbons to the length of 34″.
Then folded under both sides, so that they ever so slightly overlapped.
Now grab the center, making sure both sides are secured in your hand. Now use a piece of small wire to twist and secure the ribbon. Note: I used a twist tie from my kitchen because I always have more than I know what to do with.
Now cut another piece of all three ribbons measuring the same length as before, 34″. Place the looped bow section, that you just gathered, on top and in the center of the three ribbons.
Grab another piece of wire {or twist tie} and secure those together.
Now you will cut your last piece of all three ribbons to 6″ in length. Fold the burlap in half and lay the other ribbons on top of it.
Take this small piece and secure tightly around the wire {or twist ties} with hot glue.
Now your almost done! Cut v-notches into the tails of all your ribbons. I fold my ribbon in half, angle my scissors at a 45 degree angle and cut to achieve a perfect notch.
To secure the bow on to the wreath, take two more pieces of wire {or twist ties} and thread them through the back of the bow. Twist the wire onto the center ring of the pine wreath and secure very well.
That’s it! Now you have perfect looking bows that are identical on all your wreaths. These bows are much more durable than a traditional tied bow; they won’t be coming untied! Thanks for stopping by.
