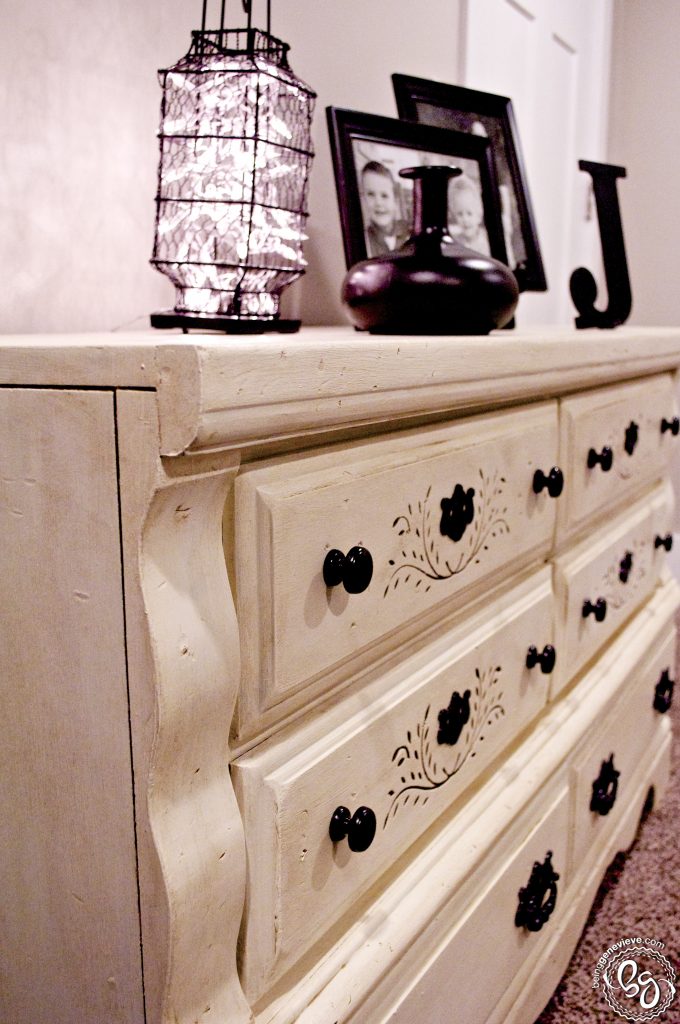
First of all, I have been looking for a second dresser for my boys for a while now. I have periodically been searching craigslist and different classified for a used dresser for a reasonable price. But then early this summer a couple down the street was getting ready to move out and had placed this beauty of a dresser next to their garbage cans. I saw it there for a week and kept waiting for them to move it to their new home. {One day I even left a sticky note on it that had my name and phone number explaining I would love to take it off their hands if they didn’t want it anymore.} After waiting a week, while we were out for a walk, I asked my husband to go knock on the door and see if they were getting rid of it. {I am way too shy to do something like that. So, luckily I have an amazing husband who loves me!} They told him they hadn’t had time to re-finish it so if we took it home we could have it. We immediately went home for the car to take it back home. 
Once I had it home, I began examining the condition the dresser was in. The drawers slide very nicely on their tracks, all the hardware was still on it, the dresser was very well made, and I loved the detailed wood work on the drawers and the curved edges.
I decided I wanted to use chalk paint and dark wax so it would fill in the distressed areas and the detail on the drawers. The only problem was I have never done anything like this before, but that had never stopped me before. So I did some reading around and this is what I picked out from the many tutorials I read. . .
Supplies
- Chalk Paint, Lace
- Clear Finish Wax
- Dark Finish Wax
- Oil Rubbed Bronze Spray Paint
- Paint Brushes
- Old Cloths
- Electric Sander, optional
Directions
Step 1: Sanding/Distressing
I began by sanding off the old finish and smoothing out as many of the dog teeth marks that I could.
Once it was all sanded, we began distressing. I thought it would be fun for the boys to do this part, being that it was going to be their dresser. I loved the idea of distressing it because a dresser in a boys room is sure to get a few nicks and dents in it, but they are less likely to show up on an already distressed dresser.
I let them pick up a tool or toy {that has left a few dents in my furniture around the house during play time} or our other son chose the old sock filled with screws and nails. They then went crazy banging and denting and loved it. Note: I had my husband dent the top and sides (which were made of particleboard) with a hammer, but it ended up not standing out on the finished product. So don’t worry about trying to distress particleboard areas.
I painted the dresser and drawers with two coats of chalk paint, color Lace. I used two containers of paint. I then spray painted all the hardware with the color of Oil Rubber Bronze. I ended up having several problems with the hardware that has a hanging handle. On my second dresser, I found that if you hold up the handle with a toothpick it works wonderfully.
Ok here is how I did my wax, but there are several ways that you can do it. I used an old towel cut into 3 pieces (clear wax, dark wax, wax removal), instead of a paint brush because I wanted to get nice swirls in the wax and I could do it easier with a towel.
Begin by putting a very small amount of clear wax on your dried paint and while the clear wax is still soft/wet add the dark wax. If you just add dark wax without the clear you will just darken your paint color to look dirty. You want some areas to remain lighter than others, giving you that antiqued look. I apply the waxes in circular motions, making sure to fill in any distressed holes or seams in the furniture. I applied the dark wax in a heavy thick layer.
I let the dark wax remain on the dresser for about 5-15 minutes and then using the wax removal cloth try to wipe off as much of the dark wax as possible, pushing quite firmly if needed. This is how you get some dark and light areas. The dark wax will penetrate into some areas very well, but not in others.
Once you have done all the dresser and drawers go back and put another coat of clear wax onto the dried dark wax.
There you have it, that’s it. I then spray painted several items I found at Savers with the oil rubbed bronze spray paint to top the dresser with.
The weekend after finishing this dresser I painted my son’s pre-existing dresser the exact same so that they would match, but being in excellent condition we did not distress it and I didn’t sand it. I painted the chalk paint right over the old finish. It worked like a dream!
