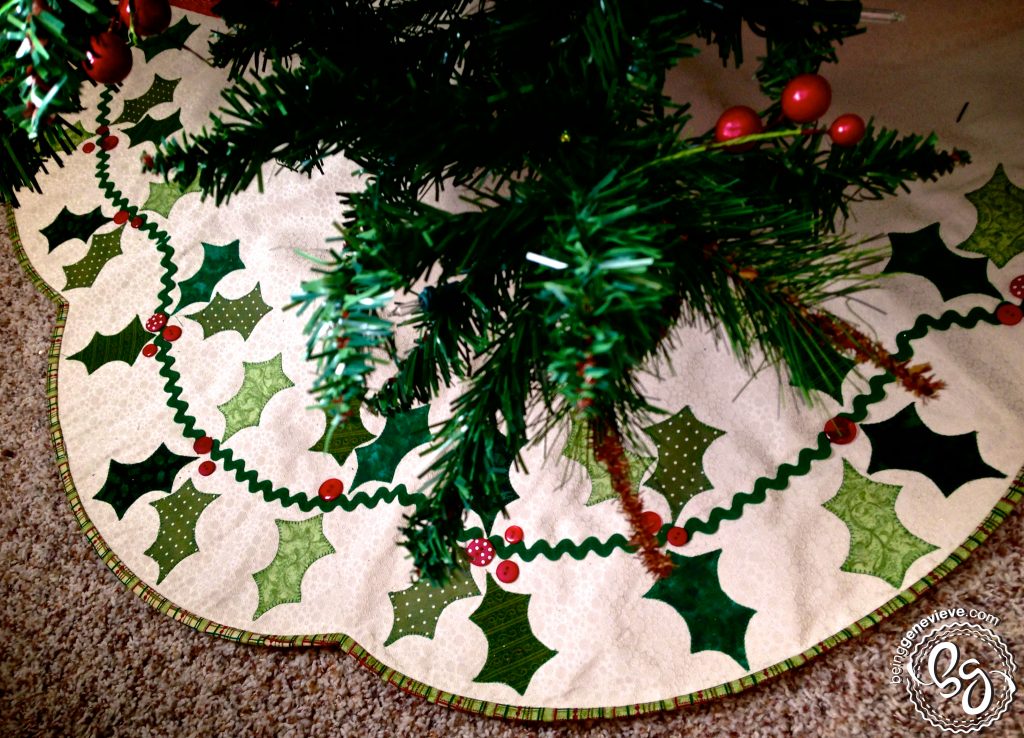
Three christmases ago I finally was fed up with laying a piece of scrap, frayed fabric around the bottom of the christmas tree. I needed a tree skirt. I knew exactly what I wanted a big scalloped edge, a simple cute design, and the classic christmas colors. Of course, I couldn’t find anything I liked because isn’t that how it works when you know exactly what you want. So, I made my own.
Supplies:
- 2 – 50″ squares of Fabric
- 45 Red Buttons, size and styles varying
- 4 yds. Green Rick-Rack
- 1/3 yd. Fabric, for binding
- 5 Green Fat Quarters, different shades and styles
- Heat ‘n’ Bond Ultra Hold
Directions:
Alright I have to confess something . . . I don’t have a piece of fabric on the underside. I know, I know. Money was tight so I just ironed a light-weight interfacing I had lying around the house to the back. The binding is just to add a finished look, not to actually bind two pieces of fabric together. If I were to make this again I would have a 50″ piece of fabric for the front and a 50″ piece of fabric for the back.
Holly Leaves, Prep.
To begin, I iron head ‘n’ bond to the back of all five of my fat quarters. You need to cut out 72 leaves total. My holly leaf template is found in a PDF below. You will cut out 14 leaves from each of the five fabrics, giving you 70 leaves total. Out of my two favorite fabrics I cut one more.
The scalloped edges.
I just free-handed the scalloped edge I wanted. Fold your fabric in half and then that in half so you have a square of about 25″. Then bring two of the opposite corners together to make a triangle. All of the raw edges should be together on one side of the triangle. Now get a large bowl or something rounded and trace a half circle on the raw edge side. Cut out and then unfold. There you have it, eight perfect scallops. Note: I recommend doing this with an 8″ square of paper before doing on your fabric.
In the very center of the tree skirt use a cup to draw a circle. Cut out the circle. Cut in between two scallops up to the center circle.
Put it together.
I laid a few holly leaves on my tree shirt to see visually where I wanted them. I then measured up from the outside edge of about where I wanted my rick-rack in relation to the leaves. Pin the rick-rack in place and sew it on.
Place the holly leaves on where you would like them. Iron in place. Note: In each of the eight scallops you will have three sets of three. That makes nine holly leaves in each scallop. Once the holly leaves are ironed on, blanket stitch or zig-zag around each one. This took me quite a while.
I placed my buttons randomly around. Some sets of leaves had three buttons, others two, and the rest one. I didn’t like how cluttered it looked with all of them having three buttons.
After everything is sewn on now it’s time to sew on the binding. I like skinny binding so I cut mine in 2.25″ strips.
Ta-da! All done and it looks amazing. I love how cute, but clean this design is. You won’t find anything like this out there. Trust me I have looked. Enjoy!
