
I love to make homemade gifts for Christmas gifts. It means more to give someone something you have taken time to make and it usually saves me money if I just make it myself.
I recently saw The Giving Manger and knew I loved it, but couldn’t spend $45 on a little wood manger (that would cost less than $5 to make) for everyone I wanted to gift this too. I then came to the dilema of if I made the little empty manger and posted about it, I would be stealing The Giving Manger’s idea. I recently was made aware that this was not true. The idea of filling the manger with straw is not a new idea. For example, There is the book The Last Straw by Paula Palangi McDonald that was published 12 years ago. There is also this article called, Straw for the Manger, that was in the LDS Friend Magazine 9 years ago. The Giving Manger has only been around for about 4 years. So, I decided I would create my own plans to make the cute little wood mangers.
I decided that I would call these the Light The World mangers. During the month of December my family and I love to follow the suggestions on how to serve others, given by the Light The World program set up by The Church of Jesus Christ of latter-day Saints. Now every time someone in my family does the Light The World suggestion for that day they can add a piece of straw into the manger, along with any other kind acts of serve that they do.
Here is how I created our manger . . .

Supplies
- MDF 1/4″ Wood
- Pattern/Plans (download below)
- Hot Glue Gun
- Ruler
- Acrylic Paints, Cream – Brown – Black – Pink
- Wood Stain, Special Walnut
- Mod Podge, matte
- Sculpey, Beige
- 2 Felt Balls or Stuffing
- White Fleece Fabric
- Raffia, 25g
Step 1 : Cut Wood
I cut all of my wood out of 1/4” thick MDF board. The MDF boards can be located next to the underlayment boards at Home Depot.
Download the manger PDF pattern/plans below . . .
![]()

Step 2 : Assemble Manger
Begin by assembling the main manger area with a hot glue gun.
Note: The shorter piece will go onto the wider piece.

Assemble the legs of the manger next. Measure down 2-1/2” on the long leg piece. Now attach the shorter leg pieces.
Draw a line where you need to cut the legs to be angled.

Attach the front/back pieces to both sides of the manger.
Lastly measure in 1” on both sides. This is where you will attach the manger legs. 

Now I wanted to have the manger look wood in color, but i didn’t just want to paint the MDF with brown paint. So here is what I did…
Begin by painting the entire manger with a light cream or beige color. Allow it to dry fully, maybe like 30 minutes.
Then take a wood stain, any color would do, but I did special walnut since I had it on hand. Now take a paper towel with wood stain on it and smear it everywhere. It dries almost instantly.
I then used matte mod-podge to seal in the wood stain, otherwise the wood stain will slowly scratch off the paint.
Step 3 : Baby Jesus
Sculpting baby Jesus
I bought Sculpey baking clay and used .5 oz. to create a 1” ball for the baby Jesus head. Now create two small balls for the ears. Attach the ears right below the center of the head and slightly to the front.
Now create two small balls for the ears. attach the ears right below the center of the head and slightly to the front. 

Notice that the ears as positioned slightly forward.
The nose is created with a tiny ball of clay. I attached mine about level with the ears.

Use a toothpick and create a cute little smile for baby Jesus.
Use the same toothpick to create holes in the ears, as I did.
Bake the sculpted head for one hour at 275 degrees.
Painting baby Jesus
I added a little pink paint on the cheeks of baby Jesus. I then painted his cute little eyes and eyebrows. Lastly, I painted his hair. 
Assembling baby Jesus
Now you can use stuffing for baby Jesus’ body, but I had 1″ felt balls lying around and thought they would work just as well, if not better. So I hot glued the felt balls together and then to baby Jesus’ head.
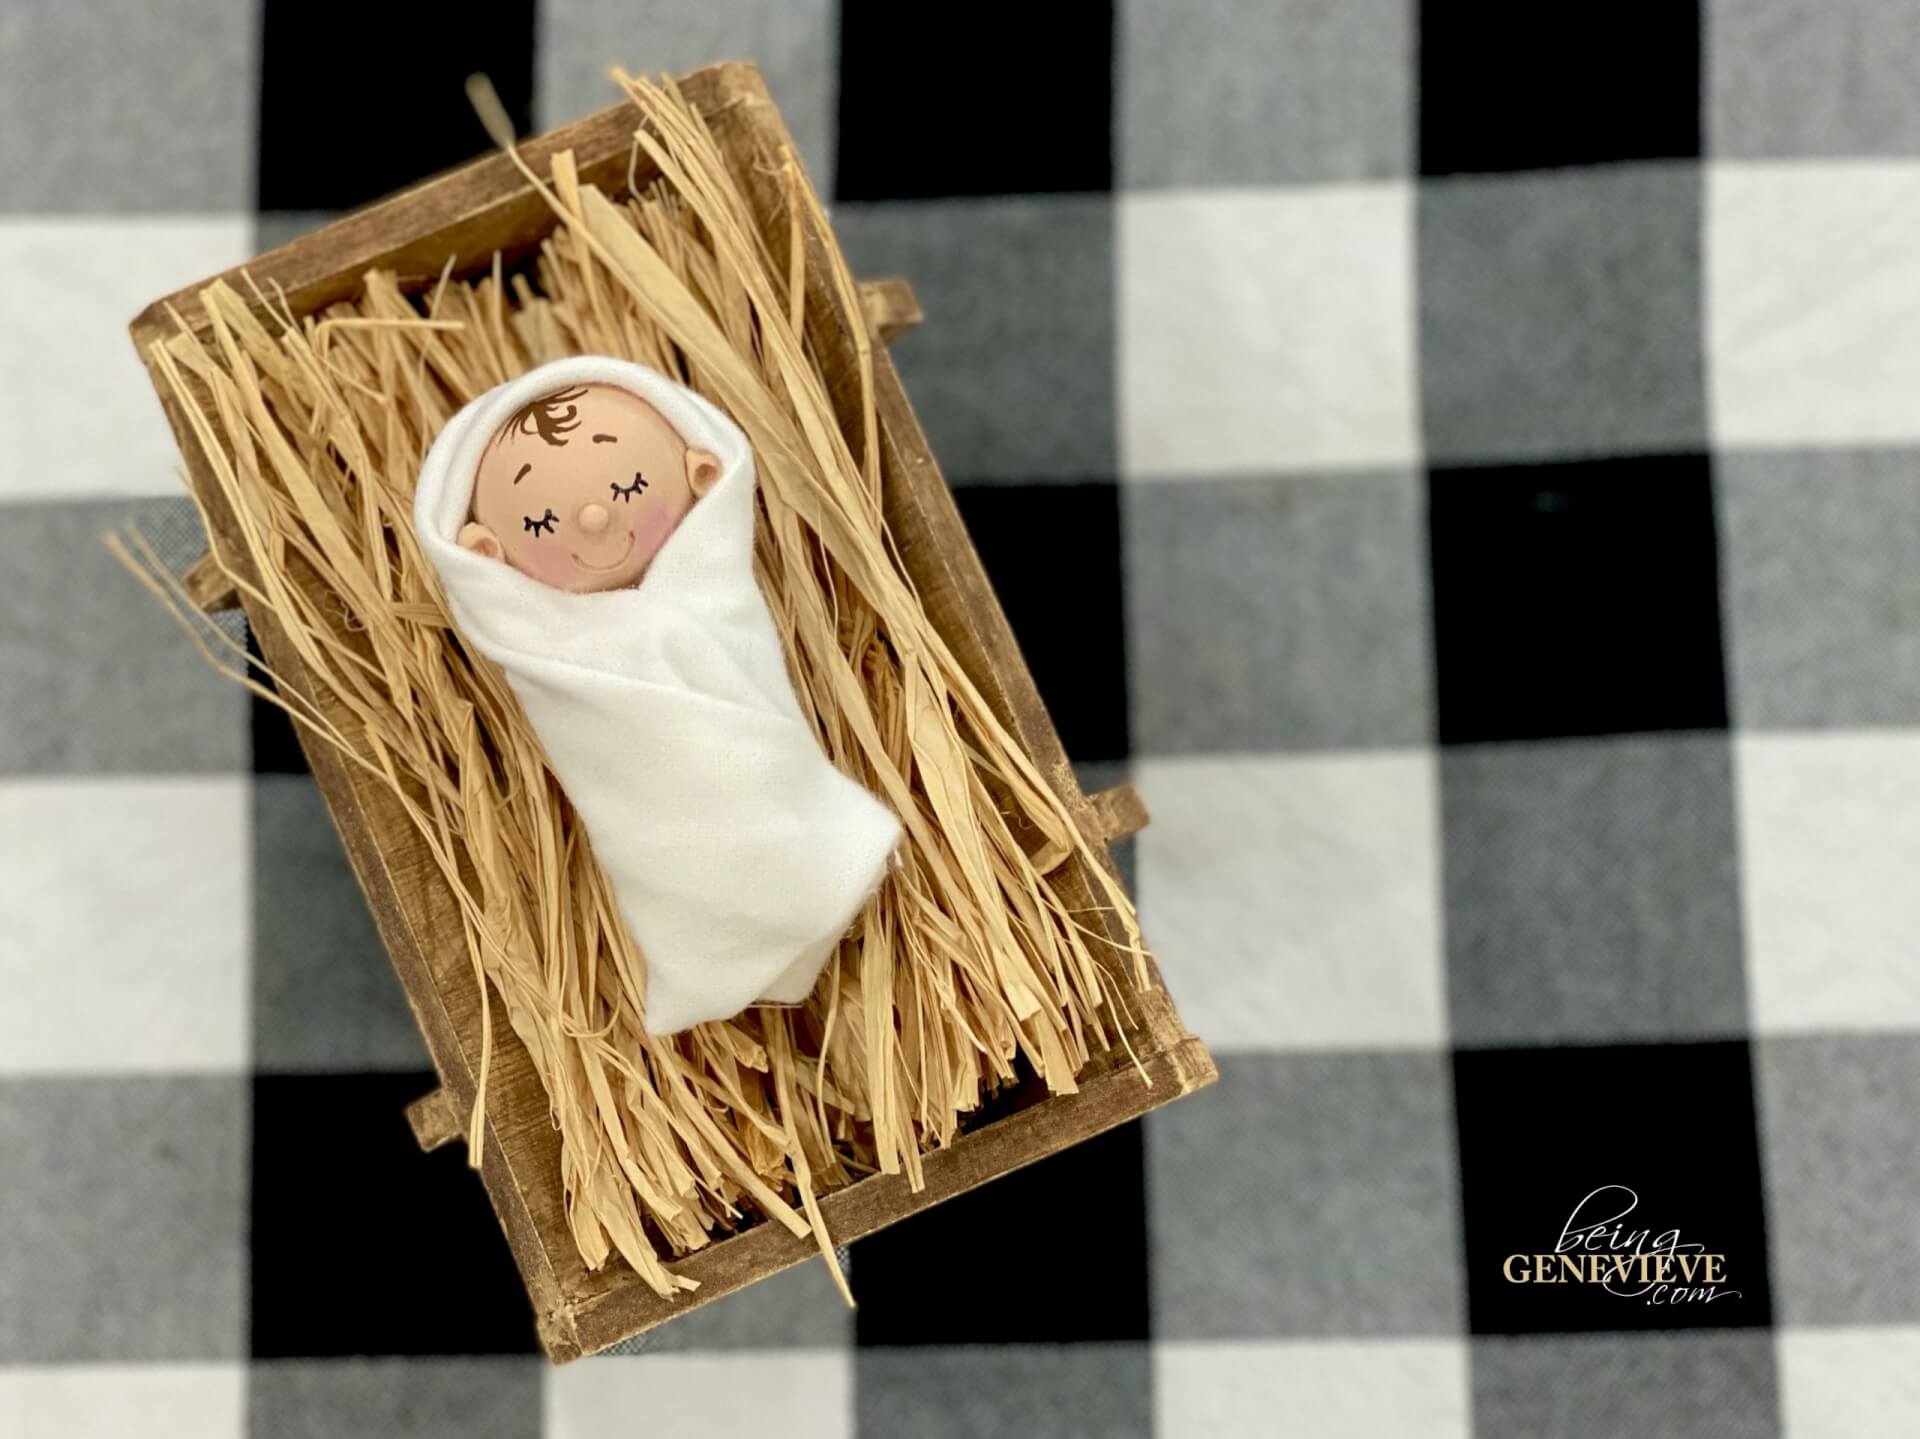
I then took a square of fleece fabric that was just cut roughly. It does NOT need to be a perfect square. Now view the pictures below to see how I wrapped up baby Jesus.
Note: I hot glued at each fold. I also wanted to make sure his cute little ears showed so keep that in mind when wrapping.


Step 4 : Manger Straw
I bought raffia and used about 25g. I cut the raffia the same length as the inside of the manger.

Now bundle up the raffia with another piece of raffia.
Step 5 : Free Printable Tag
If you know me at all, you know I love little tags on gifts. I hate writing cards, but I love making little tags! So, of course, I put together a cute little tag that can be attached to this gift explaining what it is and what to do.
![]()


